OER Resource
In this resource, you will learn how to create a new and original resource using the open author application from OER Commons. This is an extremely useful tool that can be used to build the following to meet teaching and learning needs:
- Courses
- Units
- Lessons
- Activities
- Presentations
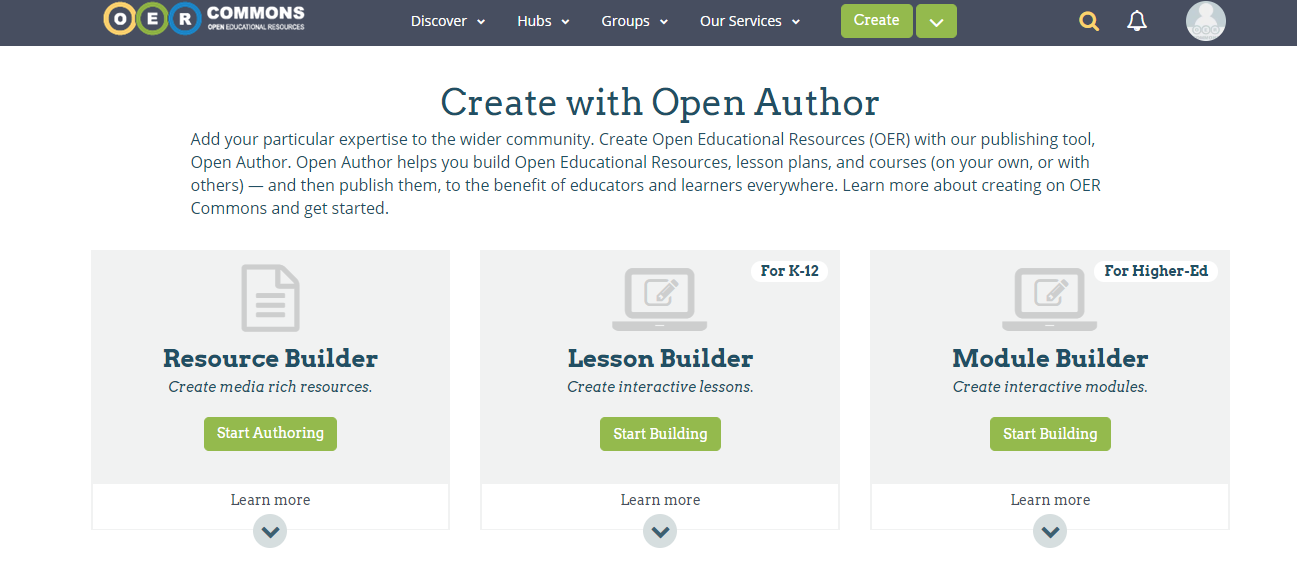
Step 1: Choosing what you will create

Drop down menu
The Open Author tool allows you to create a variety of tools that can be used for teaching and learning. The three main choices that it presents are resources (like the one you are viewing now), Lessons (most appropriate for k-12), and Modules (most appropriate for higher education). In order to access these tools you can use the drop down menu on the home screen (above) or click the create button directly to go to the screen shown below.
Open Author Create Page
Step 2: Components of an OER
When setting up your resource you will be asked to do three things; Write, Describe, and Submit. There will be tabs located in the upper right hand corner in order for you to navigate.
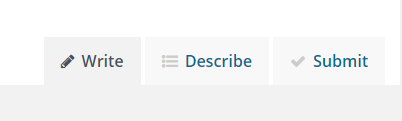
write describe submit tabs
Write
In the write section you will create you Open Education Resource. You will begin by giving your resource a title, then build upon that using headings, subheadings, texts, images, videos, and any other content that will help build your resource.
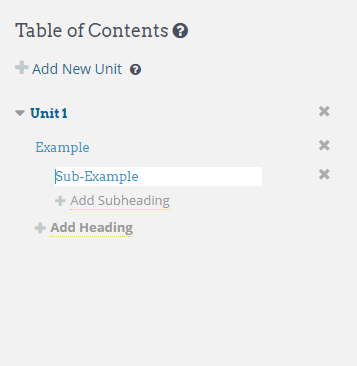
Table of Contents
Table of Contents
Your table of contents will be located to the left of the work space. here, you will be able to add unit titles, heading, and subheadings. You can also use the drop down menu on the tool bar to change the type of texts, and organize your resource (below).
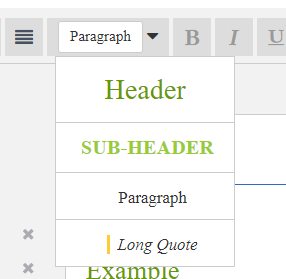
table of contents drop down
Toolbar

Open Author Toolbar
The toolbar feature is similar to most word processing applications. It allows you to (in order) undo/redo steps, use bullet points, use number list, create tables, manipulate the font and color of your texts, insert references, and insert mathematical expressions. Some of the most important features on the toolbar lay on the far right; insert link and insert media.
The link tool allows you to incorporate different websites or emails into your resource. This could be a website you would like to share with colleagues or a link to your email in the case where someone needs to ask you a question. For examples, a great resource for finding appropriate links for you resource is creative commons.
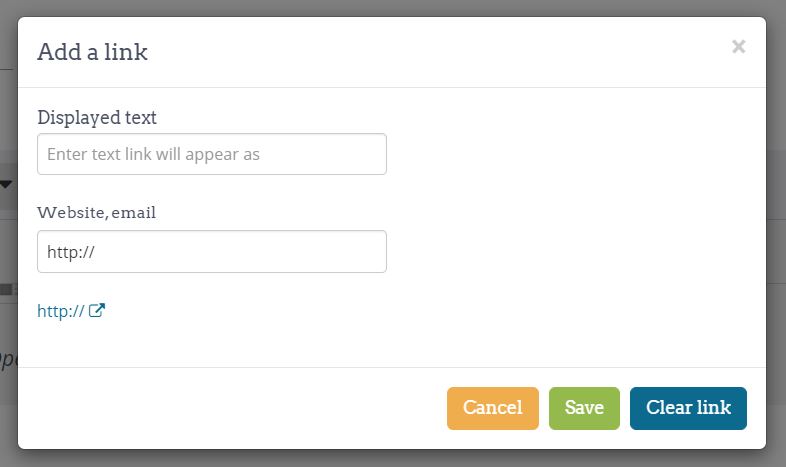
insert link tool
The insert media buttons works similarly, but this gives you the ability to insert images and videos to help enhance your resource (like the ones you have seen in this resource). You may pull images, videos, or files right from your own drive, or use links directly from the web.
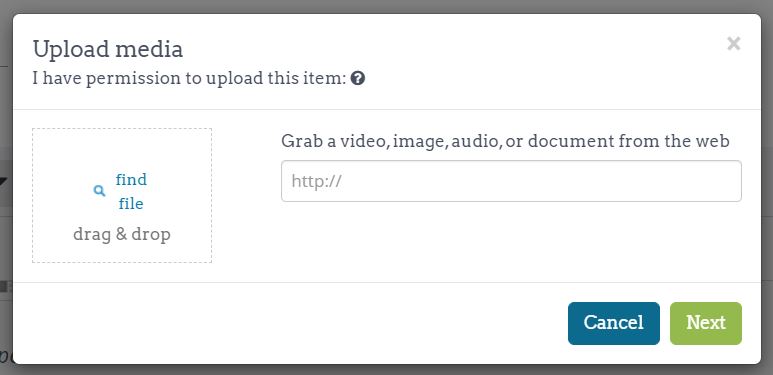
Upload Media Tool
Where to find Creative Commons resources to use?
There are great resources all over the web, you just need to make sure that you do your research. You are always able to use work that you have created on your own, things in the public domain, or licensed under creative commons. Many sites allow you to filter out work that has not yet entered the creative commons universe. Some great resources provided by creative commons are:

creative commons resources
It is also important to remember the learning environment you are in when uploading resources that you plan on using in your own classroom. If students can not access the resource, then it will not be very useful to them.
Once you become comfortable with using open author, you will be able to use it to remix other's resources as well!
Step 3: Describing your resource
Once you have finished writing your resource you will want to describe it in a way that helps others discover your work. Video shown below will help describe the different elements you will include in your "describe" section.
Step 4: Submitting your resource
Submitting your resource is your final step, and is relatively simple. Open author will ask you three questions:
- Would you like to allow modifications? Meaning: Do you want people to be able to alter the resource you've created? or would you rather it stay as is?
- Will you allow commercial use? Meaning: Can people make money off of using your resources? (i.e. in a text book)
- What is the jurisdiction of your resource? Meaning: Where can your resource be used

Submitting your resource
You simply click that you are ready to submit, and your resource will be created with its license!
I hope that this has been a helpful resource in your journey to becoming a avid user of the open author tool. Please feel free to reach our to me with any questions or to remix this resource for you own use. HAPPY BUILDING!