
Introducing the Art Form of Collage
Introducing the Art Form of Collage
A Lesson Inspired by Artist and Teacher Jean Martin
Objectives:
1. Share information about the art form of collage.
2. Create a simple collage.
3. Tell a story about the artist who creates the collage.
Audience:
This lesson would be suitable for all ages but was “piloted” at Legacy Retirement Community.
Learning Opportunity: (optional)
The idea of a Collage (derived from the French verb coller, “to glue”) is to use glue a variety of materials to assemble and create a new “whole”. The materials used in this art are only limited by the imagination of the artist. The art of Collage dates back to 10 th Century Japan but became popular in the beginning of the 20 th Century when it was used by artists to create modern art. Collage became an art form during the Synthetic Cubist period of Picasso. Pablo Picasso glued oil cloth to his surface of Still Life with Chair Caning in May of 1912. He glued a rope around the edge of the oval canvas.
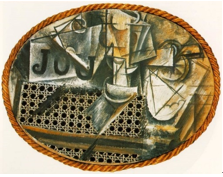
Picasso Example
Source: http://www.pablopicasso.org
Fellow Dadaist Kurt Schwitters (German, 1887-1948) also glued bits of paper he found in newspapers, advertisements and other discarded matter in art he created beginning in 1919. Schwitters called his collages and assemblages Merzbilder, a word derived from the German word "Kommerz" (Commerce, Source: http://www.dadart.com/dadaism/dada/038-Schwitters.html as in banking) which had been on a fragment of an advertisement in his first work. Source: “Art History Definition: Collage http://arthistory.about.com/od/glossary_c/a/c_collage.htm
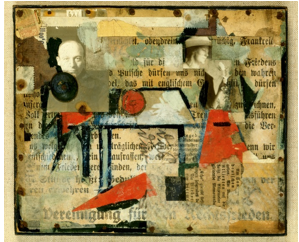
Kurt Schwitters Example
Source: http://www.dadart.com/dadaism/dada/038-Schwitters.html
Supplies/Materials:
- 9x12” pieces of Masonite (or other suitable paper base) for each participant
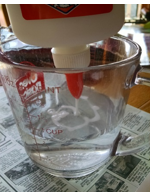
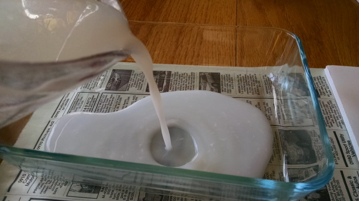
- Glue Mixture: 3 parts white glue to 1 part water (or glue sticks—see comments below)
Glue Mixture Image
- Disposable bowls (one for each participant) to hold glue at their work station (glue sticks are optional)
- A pitcher to replenish glue for participants during the class
- Damp towels for each student for cleaning hands
- Scissors
- Index card and pen/pencil/sharpie for each participant
- Masking tape
- For each participant: 10 or more pages containing images/pictures torn from magazines, paper clipped together. (Note: the facilitator may want to group the pages in advance according to subject matter, color or theme, etc.)
- Cleaning supplies
Important Note: This lesson was designed for participants to use a glue mixture and Masonite back board to create the collage. Following is a recommendation from Christine Hennig (artist, registered art therapist and licensed mental health practitioner) concerning creating collages:
“Liquid glue is recommended only for collages on a firm base, such as the Masonite mentioned. If collages are to be made on paper, you should use glue sticks instead, as liquid glue will make the paper buckle. This might seem like a little thing, but it’s important when working with people without much art training that the facilitator make media choices that are likely to produce an attractive result. Inexperienced artists tend to blame themselves for any failures or problems in the art—i.e. “My collage buckled because I’m a bad artist/not artistic/not creative, etc.”, not realizing that the truth is “My collage buckled because I used the wrong kind of glue.”’
Prior to the Class:
Have a station set up for each participant which includes the base for their collage, a bowl for glue (or glue sticks if that is preferred), damp towels for cleaning hands, scissors, etc.
Glue station
Class Instruction:
1. Tell the participants about the art they will be creating.
2. If available, show some examples of collages, especially the collages you and your assistant(s) made.
3. Pass out the sets of paper-clipped magazine pages, greeting cards, etc. to each participant. (Note: if you give the participants entire magazines to select their images, they could get sidetracked looking at the magazine rather than creating the art.)
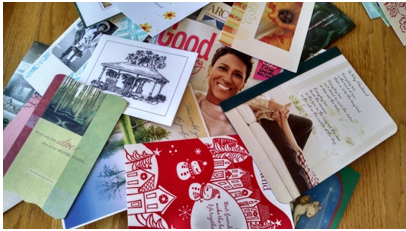
Supplies
4. Tell the participants that their collage will be more interesting if they tear the desired images from the magazine pages rather than cut them but that scissors are available if they need them.
5. Ask each participant to select and tear out one image from their magazine pages.
6. Standing at the front of the class with your own blank Masonite/paper board, magazine pages and bowl of glue:
a. Tear a picture from the magazine
b. Dip the picture into the bowl and squeeze off extra glue
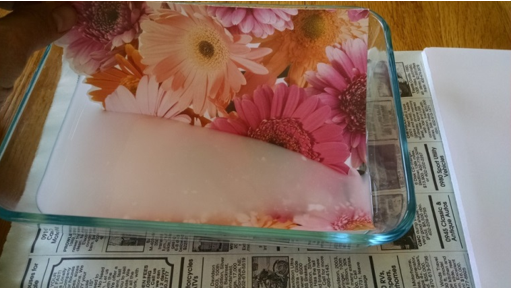
Dip Image
c. Lay the picture on the board in any random place
d. Smooth the paper onto the board, gently working out excess glue (Note: using a glue stick is also an option.)
7. Ask the participants to follow your example with their own torn magazine image for their collage.
8. Repeat the process for a second and possibly third picture and then turn your participants loose.
9. You do not need to talk about composition or a focal point of the art, the participants will key in on that if they desire. The most important aspect of the lesson is the process of creating art—not necessarily the end result.
10. Circulate around the room to answer questions and give encouragement but, for the most part, just leave the participants to create their art.
11. Provide additional materials to any participants who may have time and wish to create an additional collage.
12. Allow the collages to dry overnight before getting them ready for display or returning them to the participants.
13. Use thinned down glue or Modge Podge to coat and preserve the final creation.
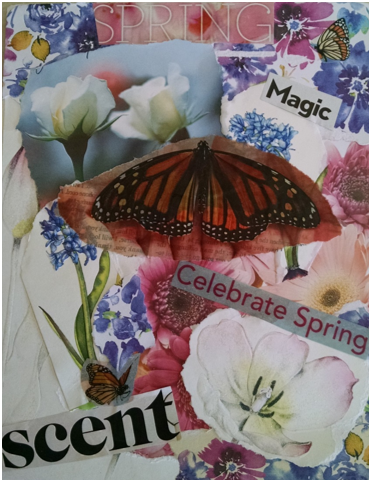
Finished Collage Example
At the Conclusion of the Class:
When the participants have finished creating their art, ask them to use their index card to write their name and age (optional) on the card as well as a brief “artist statement” that tells about:
- Their creative process (what they were thinking while creating the art, choices they made, etc.)
- The message (if any) they wanted their art to convey
- Their personal feelings about creating this art
- Gently attach the index card to the back of the art using masking tape.
- Allow the art to dry overnight before handling it further.
- You can mount the art onto a white or black backing board (or cardstock) slightly larger than the Masonite/paper board to give a finished look.
- Type up the Artist statements to include with the art.
- Consider having an artist reception when the artwork is unveiled.
- At the conclusion of the display, return the art to the students.