Art Bridges - Hildegard Center: Fabric Bowls
Art Bridges - Hildegard Center: Fabric Bowls
A Lesson Developed and Contributed by Christine Hennig, MA, LMHP, ATR
Objectives:
1. To increase feelings of competence and usefulness by creating something beautiful
2. To create feelings of enjoyment through exploration and combining of attractive materials
3. To encourage reminiscence of positive memories of sewing and fabric crafts
Audiences:
This lesson could be done with most adults and older kids. It is especially good for elderly women, as many of them have fond memories of sewing and fabric crafts, yet they can no longer do those crafts due to vision or fine motor impairments. This project allows them to make something beautiful with fabric that doesn’t involve any sewing.
Supplies/Materials:
- Cotton fabric in assorted colors and patterns. Each participant will need a fair amount of fabric in two different patterns. Bundles of “fat quarters” for quilting are great for this project, and they can be found at fabric and craft stores.
- Sharp scissors that cut fabric well
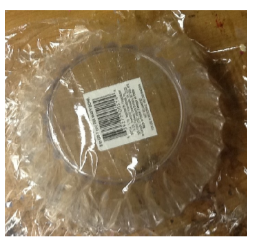
- Medium sized bowl made from plastic, glass, or ceramic (this will be used as a mold for the fabric bowl and will not become part of the piece; the size of this bowl determines the size of the finished fabric bowl)
- Plastic wrap, such as Saran Wrap or Glad Wrap
- Mod Podge (you’ll use a lot for this project; get a big jar)
- Foam brushes
Prior to Class:
- Create a sample bowl to give participants an idea of what the finished product will be like.
- This project requires some rather precise dry timing, so make sure to read through all the instructions before deciding to do this with your group, so you can adjust the timing of the sessions.
Class Instruction:
1. Begin the class with greetings and friendship. If necessary, introduce (or reintroduce) yourself to your group, putting everyone at ease.
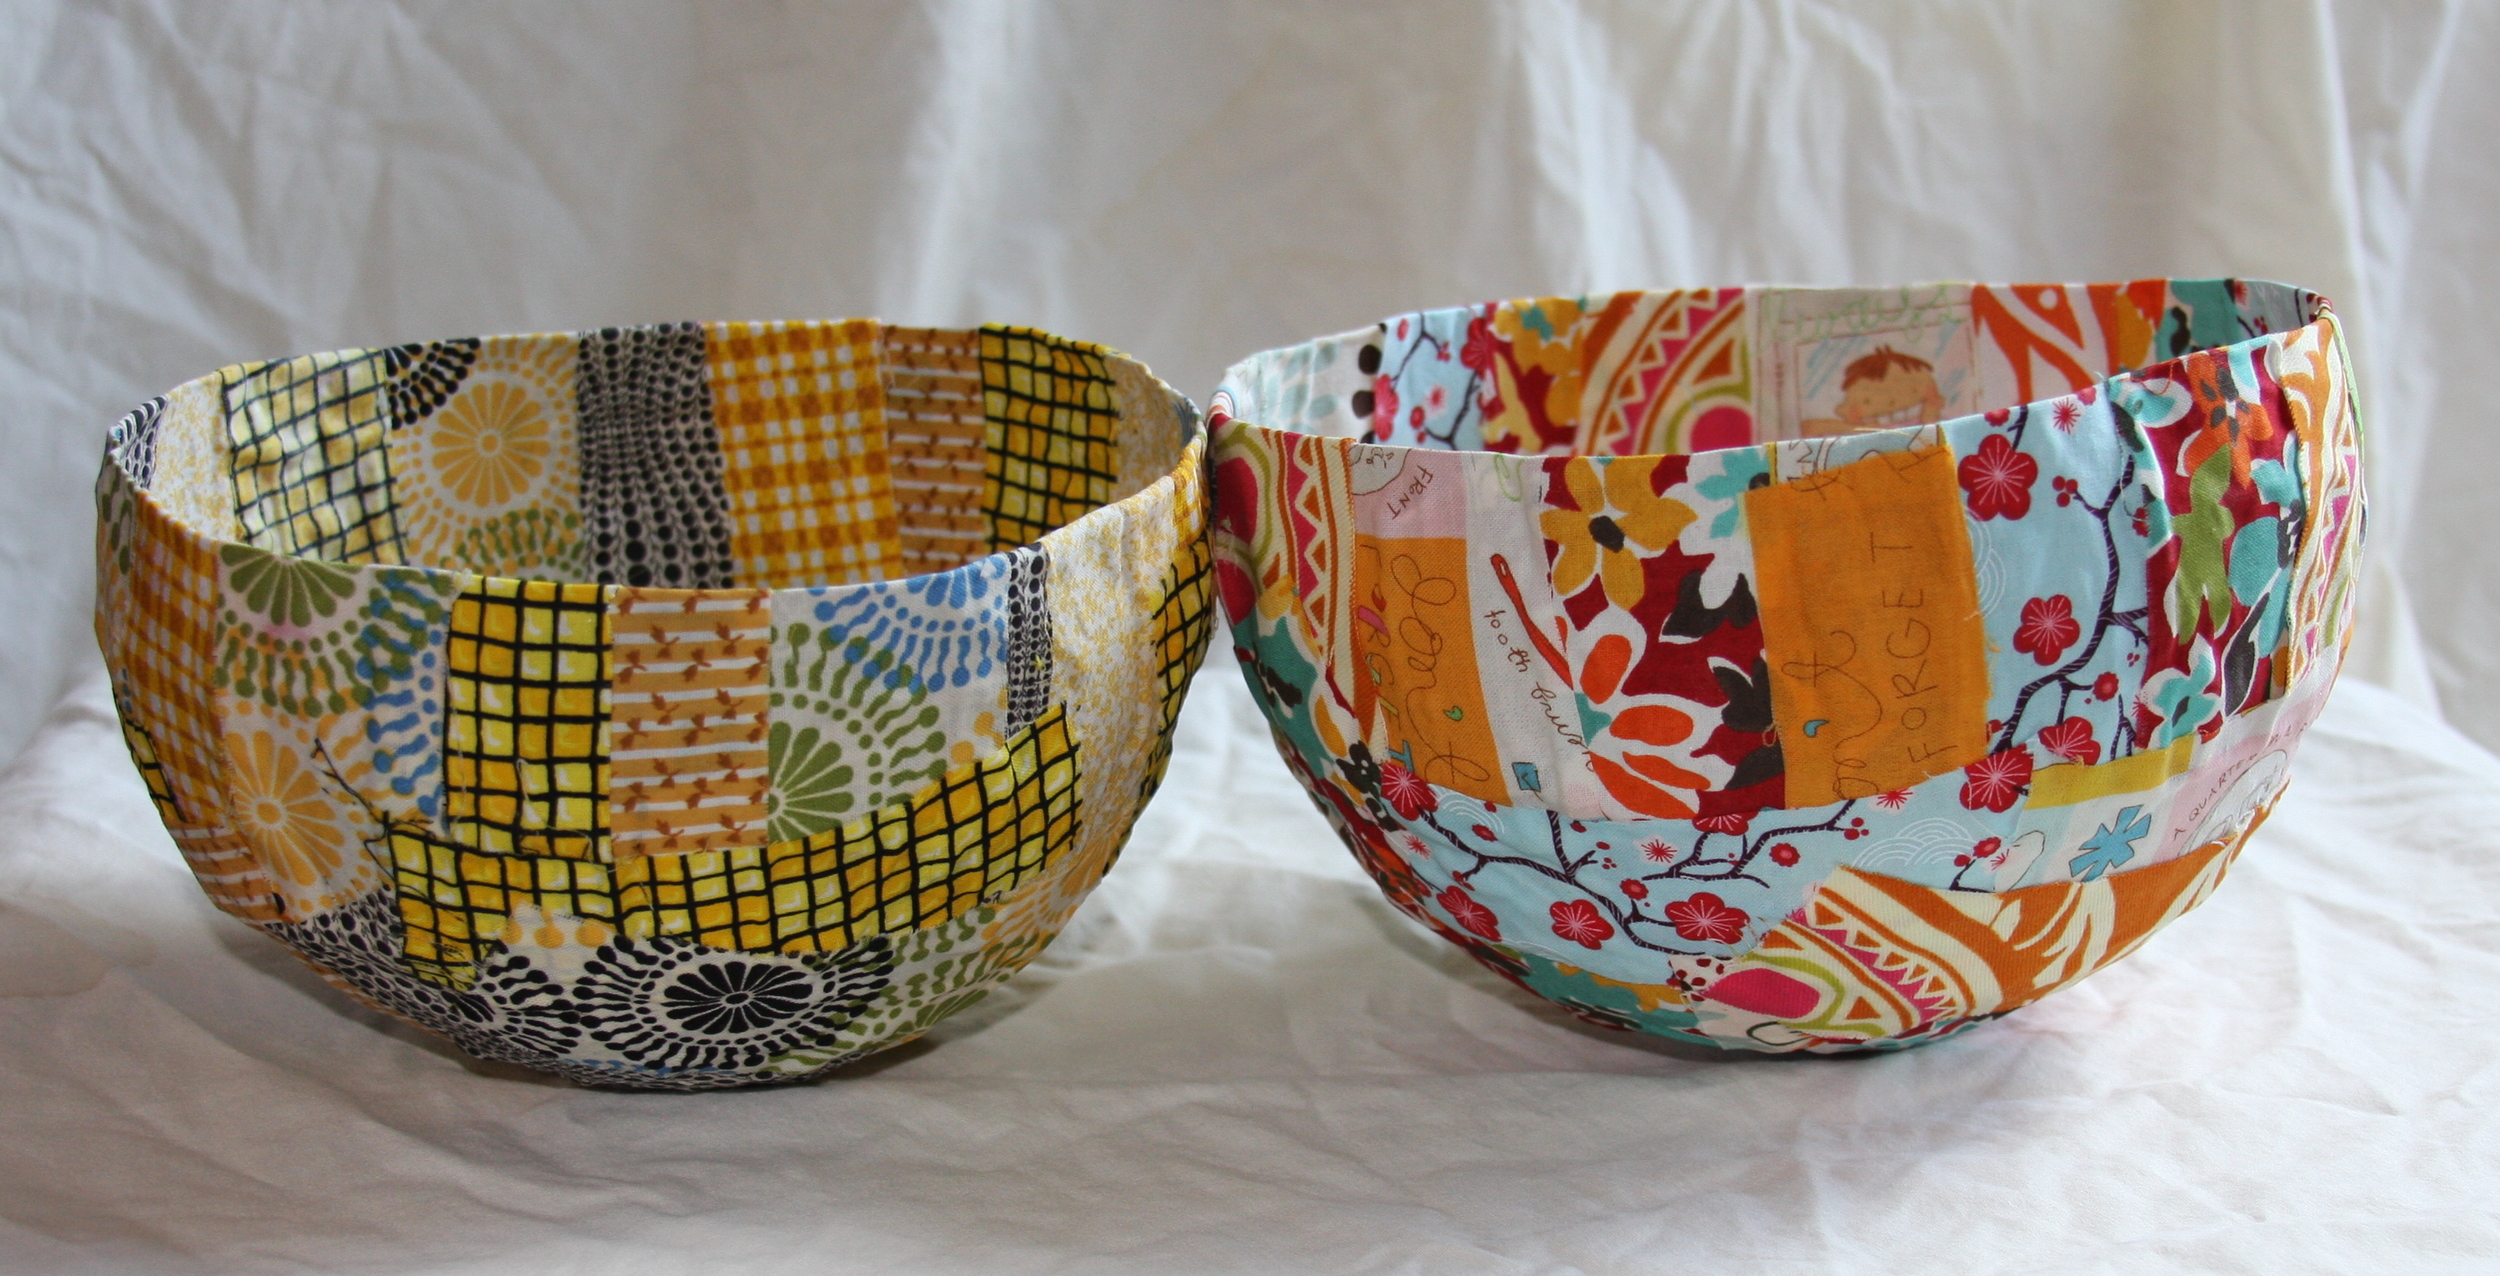
2. Show an example of the art to be created during the session—a Fabric Bowl.
3. Get out the fabric and have each participant choose two different patterns—one for the inside of the bowl and one for the outside of the bowl.
4. The fabric is cut into strips. For a medium-sized bowl, the strips should be about 1” wide and long enough to reach from the middle of the bottom of the bowl you’re using for the mold to slightly beyond the top edge of the bowl (check the pictures below if this is confusing for you).
5. Place the bowl upside down on the table and cover the outside of it with plastic wrap. If the wrap is not wide enough to cover the bowl on some sides, use two pieces of wrap, crossed over each other, to cover the entire bowl.
Mod Podge Step 5
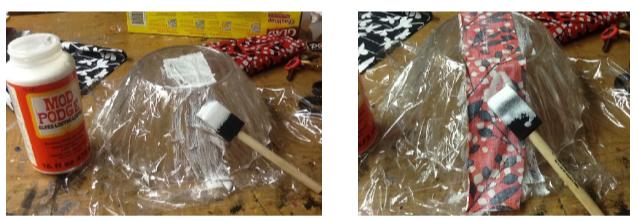
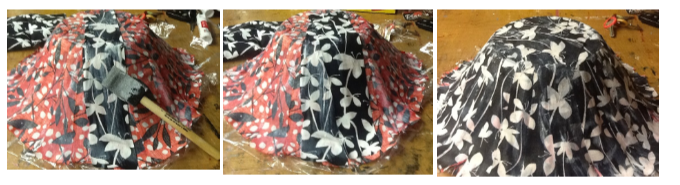
6. Using a foam brush, brush Mod Podge on the bowl in a stripe as long and as wide as one of the fabric strips, starting from the center of the bowl’s bottom and going down to the top of the bowl. Decide which fabric pattern you want for the inside of the bowl and take a strip of that fabric and place it in the Mod Podge, wrong side up. Like the Mod Podge, the strip should extend from the center of the bowl’s bottom to a little over the top edge of the bowl. Once the fabric strip is on the bowl, cover it with a coat of Mod Podge.
ModPodge Step 6
7. Brush another stripe of Mod Podge on the bowl next to the strip of fabric you’ve just laid down. Put another strip of fabric on the bowl so that it slightly overlaps the strip you put down before. Again, it should be wrong side up. Cover the strip with a coat of Mod Podge.
ModPodge Step 6
8. Continue in this fashion until you’ve covered the entire bowl with fabric strips. They should all be wrong side up, and covered with a coat of Mod Podge after you put them on. The strips should slightly overlap, so that the bowl is covered without gaps.
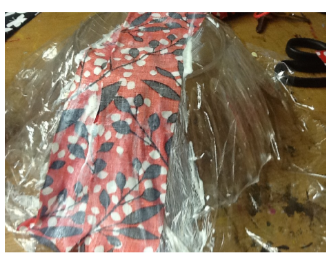
9. Now you will begin a second layer of strips with the other pattern of fabric that you chose for the outside of the bowl. Do this just like the first layer, except this layer should be right side up.
ModPodge Step 7
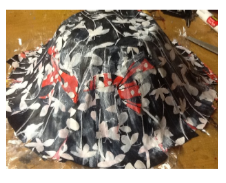
10. If you like, you can cut shapes out of contrasting fabric and glue them to the bowl with Mod Podge to decorate it. Put a coat of Mod Podge over each shape to seal it down. This step is optional, and I’ve made many good fabric bowls without it.
Modpodge Step 10
11. Let the bowl dry for about one hour. The bowl should look mostly dry on the outside when you go on to the next step.
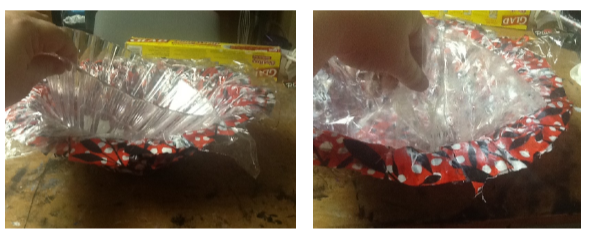
12. Take the fabric bowl off of the mold bowl and carefully peel off the plastic wrap. The bowl will still be somewhat wet on the inside. You may be tempted to let the bowl dry completely before removing it from the mold bowl, but if you do, the plastic wrap will be very difficult to remove. I’ve tried different dry times and discovered that about one hour is the best for a medium sized bowl. After peeling the plastic wrap off, you can optionally add fabric shapes to the inside at this point, using the same technique as for the outside.
ModPodge Step 12
13. Let the bowl dry completely.
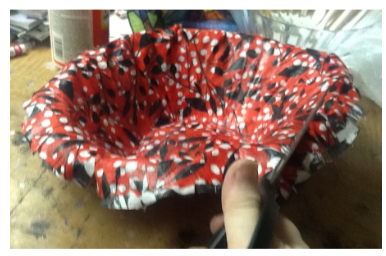
14. After the bowl is dry, you can optionally trim the edges with scissors if they seem unattractively uneven to you. I’ve trimmed some and left others as-is.
Modpodge Step 14
15. Encourage elderly participants to reminisce about sewing and fabric crafts while working on their bowls.
16. The finished bowl functions more like a basket than a bowl. One suggestion for use is to put yarn and needlework supplies in it.
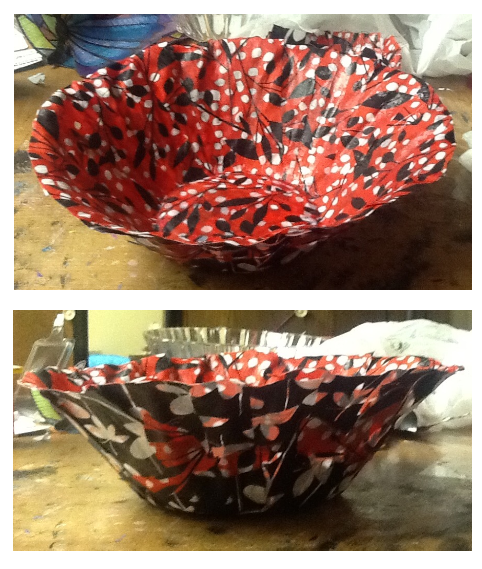
ModPodge Step 16
Christine Hennig, MA, LMHP, ATR is a registered art therapist and a licensed mental health practitioner in private practice in Omaha, Nebraska. Christine’s passion is to help people heal and grow by harnessing each person’s natural creativity. She provides art therapy, counseling, creative coaching, and creative life review services in her practice. Check out her website at www.christinehennig.com for more information.