Design Thinking for 11th Graders
Introduction for Student
This activity is designed to introduce to students what design thinking is all about! It is an opportunity to experience the steps to creative problem solving.
Students will learn about the process and apply what they have learned to a real-world issue—bullying.
Introduction for Teacher
Design Thinking, a method for generating and exploring ideas, is an excellent process to assist teachers in problem-solving or creating.
Students will need guidance as they explore the process for design thinking. They might need to discuss how to write strong interview questions. They will need assistance synthesizing what they have learned through the interviews to begin taking steps to problem-solving.
Links to Resources for Educators
Stanford University's d.school K-12 Lab wiki
Design thinking is a methodology for creative problem solving. You can use it to inform your own teaching practice, or you can teach it to your students as a framework for real-world projects....
... We believe that creative confidence comes from repeated practice using a human-centered creative process to solve problem scenarios called design challenges. After using the process on these challenges, people will have another tool, the design thinking process, to apply towards solving real life problems.
IDEO's Design Thinking for Educators Toolkit
The Design Thinking for Educators Toolkit contains the process and methods of design adapted for the context of K–12 education. It offers new ways for educators to be intentional and collaborative as they design solutions for their schools, empowering educators to create impactful solutions for complex challenges.
REDlab—Research in Education &Design
REDlab was founded in 2009 to study the impact of design thinking in education. It grew from the Taking Design Thinking to Schools Project, which was funded by Stanford’s K-12 Initiative. It sparked a partnership between the Stanford School of Education and the Hasso Plattner Institute of Design (d.school). The goal was to partner with local schools to explore the feasibility of design thinking as a new way to teach and learn.
Edutopia's article describing Design Thinking
Design Thinking is an approach to addressing challenges in a thoughtful and fun way, where you get to apply the 4Cs -- collaboration, creativity, critical thinking, and communication –- to your own work as you develop new solutions for your classroom, school, and community.
Learning Objectives
Students will understand and be able to apply design process. We would hope that the take-aways from this lesson will be applied to formal and casual/daily problem solving.
Students will create viable solutions to a real world problem by utilizing the design process.
Possible Common Core State Standards correlations: W.CCR.2, W.CCR.7, L.CCR.4, R.CCR.7, R.CCR.4, SL.CCR.1, SL.CCR.4, SL.CCR.2
Design Thinking Reading
Activity One—Read
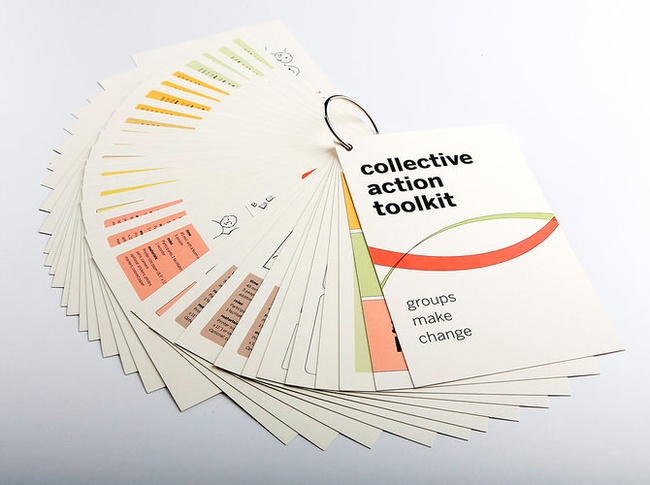
Read the attached blog post about an innovative design thinking guide.
Activity Two **Extra Credit*
• Underline or highlight 2 or 3 words that you do not know and break each of them down into the the word origin
• Write and define two other words with the same root.
• Share these words with your classmates on the "Design Thinking" blog for this lesson.
Example

neologism—a newly coined word or expression.
neo=new
log/logo=word
"neoclassical"—the revival of a classical style or treatment in art, literature, architecture, or music.
"catalogue"—a complete list of items, typically one in alphabetical or other systematic order.
Design Thinking Process: Empathize—Interview
This is it! You have read about Design Thinking and now it is time to start you own project.
Bullying can spoil a person's enjoyment and ability to learn in a school situation. Your Design Thinking challenge will be to come up with a creative solution to minimize/eliminate bullying in YOUR school.
Start by forming groups of 3-6 students, as assigned by your teacher.
Before starting, take a few minutes to get calm and focused. The Embodiment Foundation calls this the Lizard Push-up. It is the action of uplifting and taking a long exhale breath, then expanding your energy out a bit more and relaxing/settling.
Inhale and lift up your body and spirit, exhale and soften your chest and shoulders connecting to the earth. Expand your personal space to fill the room and beyond. Invite the spirit of your teachers and mentors to empower all that you do. Throughout the day you can take five seconds to do this—we call it a lizard push-up!
Interview 2–5 people who have experienced a bullying incident, worked with anti-bullying groups. Ideally you will have at least a couple different points of view such as student, teacher, guidance counselor, administor etc.
The three established roles to look for are: bully, bullied, and bystander. Can you find a resister, defender, or witness?
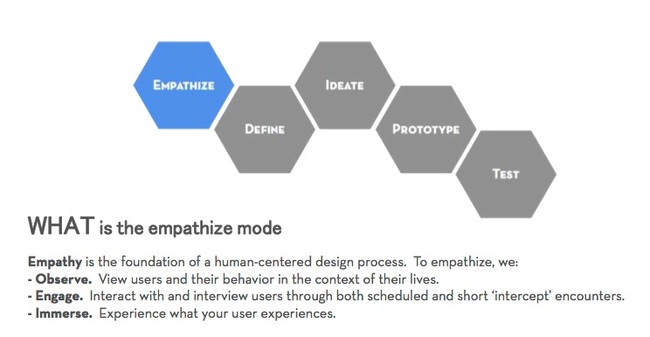
Time is precious, so make the most of it! Read this excerpt from Stanford University's "d.school" about interviewing for the Design Thinking process then follow these steps:
Activity—Prepare for the Interview
- Brainstorm questions
- Identify and order themes
- Refine the questions
- Conduct the interviews in teams of at least two people
- Appoint one person to take notes
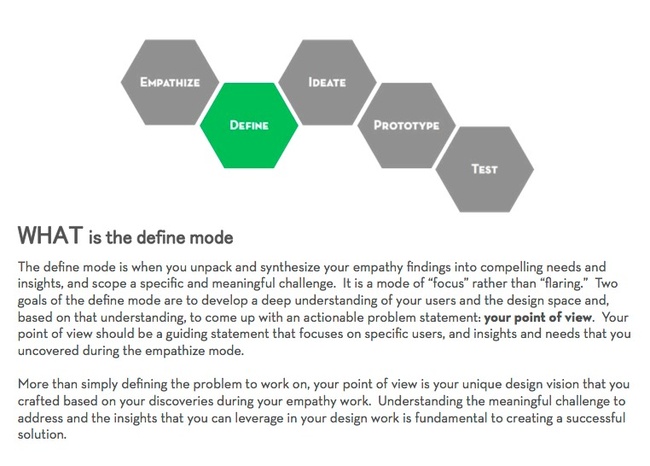
Design Thinking Process: Define—Sort through the data
At this point, your teams will work together to define the problem of bullying more specifically. After the interview process, your teams will have data in the form of DIRECT QUOTES from & OBSERVATIONS of the interviews. It is a good idea (and fun) to write individual quotes and observations on sticky notes and then group them together under various headings on a whiteboard or large flip chart pads of paper.
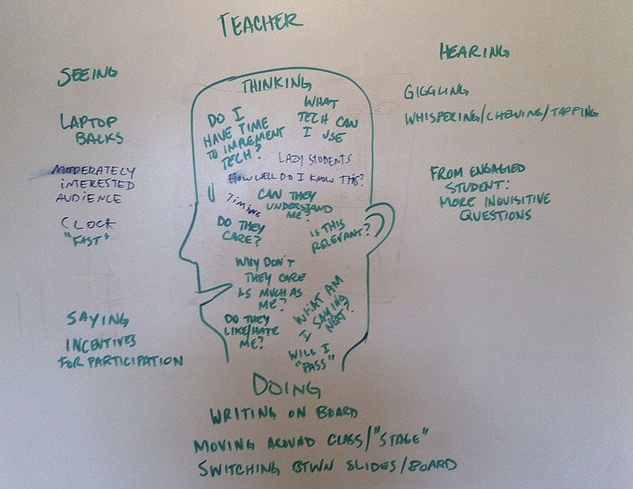
Activity—Empathy Map
Create an Empathy Map
Start by drawing a large head in the middle of a whiteboard or flip chart paper. Draw lines to create the following sections. Then label them:
- HEAR on the upper left
- THINK in the upper middle
- SEE in the upper right
- SAY in the lower right
- DO in the lower middle
- FEEL in the lower left
Relying on your interview notes, write what you heard, saw, and (on sticky notes or directly on the whiteboard/paper... just remember to capture it for future reference!). Consider what the bully, bullied, or bystander is trying to accomplish, what they is struggling with, and what are their challenges.
| HEAR | THINK | SEE |
| FEEL | DO | SAY |
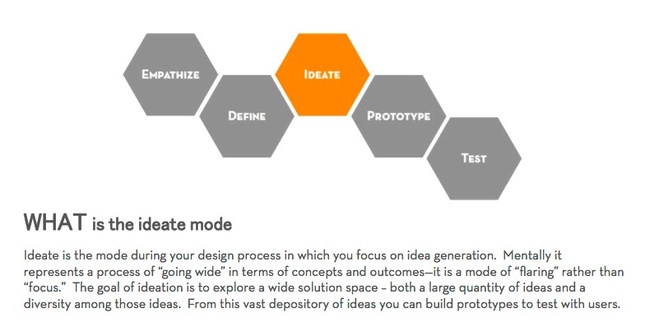
Design Thinking Process: Ideate—Generate Ideas
Each group can choose one of the following methods to help you ideate. Or, your teacher can introduce another method.
First, though, in order to loosen up and feel team spirit, STOKE!
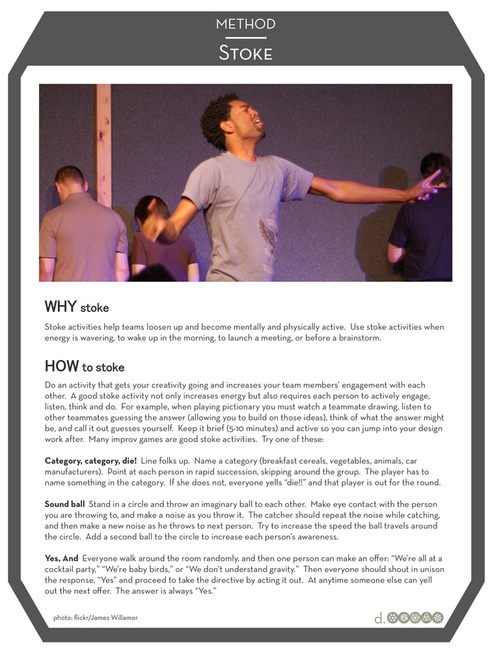
Activity—Brainstorming when you have too few ideas
You have permission to be silly! In the ideation phase, QUANTITY is encouraged. Become savvy, silly, risk takers, wishful thinkers, and dreamers of the impossible...and the possible!
- Use Osborne's Method if your brainstorm seems sluggish.
- A series of simple questions, which can be used either individually or in groups, designed to support creative and divergent thinking when faced by a design problem. The questions need a point of focus, which could either be an existing solution or proposed concepts to a design problem. The questions should be taken one at a time, to explore new ways and approaches to the problem.
- In a brainstorming session, it can be useful to write each of Osborne's statements (Other uses? Adapt? etc.) on a card, and randomly select a card when discussing alternative solutions. Alternatively, paste the questions onto a board and place in the design team's environment.

Activity—Brainstorming when you have "too many" ideas
- "How Might We?" Statements.
- In order to "ideate" a potential solution that addresses the needs that were identified in the Define stage of this process, try the "How Might We?" statements. A "How Might We?" is a statement that asks how you could/would do something. This method can help to narrow a group that has solutions that seem to be drifting far from the issue.
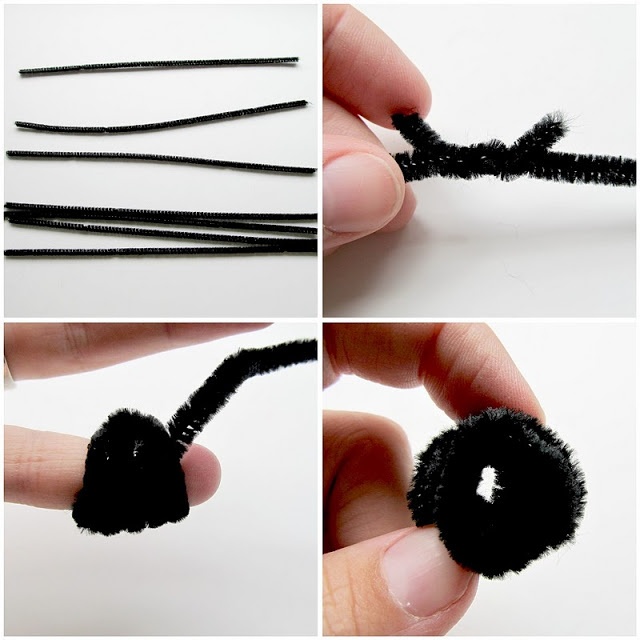
Design Thinking Process: Prototype—Make Your Idea Real

From the previous process, each group should have at least ONE SOLID IDEA. The solutions that are most suitable for a quick physical mockup are the ones to bring alive in this process.
Activity—Build a Prototype (or two or ten)
Be focused. Do another Lizard Push-up exercise to get centered. Choose a single aspect of your idea and make a physical object that addresses a specific task or two. Do it quickly and stay focused on how the end-user will feel with the object.
Your teacher will supply you with some inexpensive materials, but use your imagination and bring along your own motley collection of old toys, aluminum foil, pipe cleaners, clothes pins, and anything else you can imagine.
Design Thinking Process: Test—Fail, fix, test, repeat
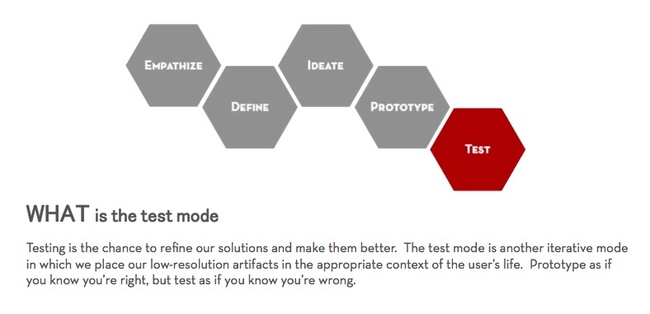
Activity—Write about the process
After your group has created the prototype, write an explanatory text that outlines the process of moving from the idea to a physical prototype.
Activity—Show the rest of the class your prototypes
Each group will present its prototype to a potential user of the prototype in front of the class. Later, the group can explain what it does and how they came to the idea, but the testing phase is intended to show how the prototype works and fails. Ask for feedback.
Failure is simply the opportunity to begin again, this time more intelligently.
~ Henry Ford
Activity—Giving feedback
When commenting on a prototype, bear in mind that it is a "quick and dirty" specimen, NOT A POLISHED RELIC. This is a work in progress and every comment can potentially improve the final design solution.
Use the phrases "I like" and "I wish" when testing others' prototypes. Keep the comments positive! Instead of saying, "I didn't like the red box" you could say something like, "I wish the box had a more subtle color."
Consider is the prototype an appropriate response created from the information gathered and the research that your team has done. The question to ask is: "Will it be an effective tool for addressing the problem of bullying?"
Activity—Apply changes to the prototype and test again
Repeat as many times as possible!
Blog
Make a class blog on WordPress (or some other user-friendly blog engine) where you ALL can post thoughts about the Design Thinking process and share your experiences in living color.