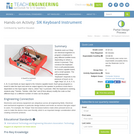
Students work as if they are electrical engineers to program a keyboard …
Students work as if they are electrical engineers to program a keyboard to play different audible tones depending on where a sensor is pressed. They construct the keyboard from a soft potentiometer, an Arduino capable board, and a small speaker. The soft potentiometer “keyboard” responds to the pressure of touch on its eight “keys” (C, D, E, F, G, A, B, C) and feeds an input signal to the Arduino-capable board. Each group programs a board to take the input and send an output signal to the speaker to produce a tone that is dependent on the input signal—that is, which “key” is pressed. After the keyboard is working, students play "Twinkle, Twinkle, Little Star" and (if time allows) modify the code so that different keys or a different number of notes can be played.
This lesson focuses on ultrasound wavelengths and how sound frequencies are used …
This lesson focuses on ultrasound wavelengths and how sound frequencies are used by engineers to help with detection of specific distances to or in materials. Students gain an understanding about how ultrasonic waves are reflected and refracted. Students also see how ultrasound technology is used in medical devices. The activity following this lesson allows students to test their knowledge by using the Sunfounder Ultrasonic sensor and Arduino Mega Microcontroller.
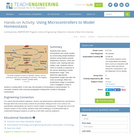
Students learn about homeostasis and create models by constructing simple feedback systems …
Students learn about homeostasis and create models by constructing simple feedback systems using Arduino boards, temperature sensors, LEDs and Arduino code. Starting with pre-written code, students instruct LEDs to activate in response to the sensor detecting a certain temperature range. They determine appropriate temperature ranges and alter the code accordingly. When the temperature range is exceeded, a fan is engaged in order to achieve a cooling effect. In this way, the principle of homeostasis is demonstrated. To conclude, students write summary paragraphs relating their models to biological homeostasis.
No restrictions on your remixing, redistributing, or making derivative works. Give credit to the author, as required.
Your remixing, redistributing, or making derivatives works comes with some restrictions, including how it is shared.
Your redistributing comes with some restrictions. Do not remix or make derivative works.
Most restrictive license type. Prohibits most uses, sharing, and any changes.
Copyrighted materials, available under Fair Use and the TEACH Act for US-based educators, or other custom arrangements. Go to the resource provider to see their individual restrictions.