Create Your Own Keychain in Tinkercad
Create Your Own Keychain in Tinkercad
SUPPLIES
Computer with internet access, 3D printer (optional)
Learn how to create your own 3D keychain in Tinkercad. Discover several useful tools, then explore on your own to see what else you can make!
INSTRUCTIONS
Step 1 - Dowloadable Instructions
Follow the instructions below, or print out a copy of the pdf version.
Attachments:
Tinkercad Keychain Instructions.pdf
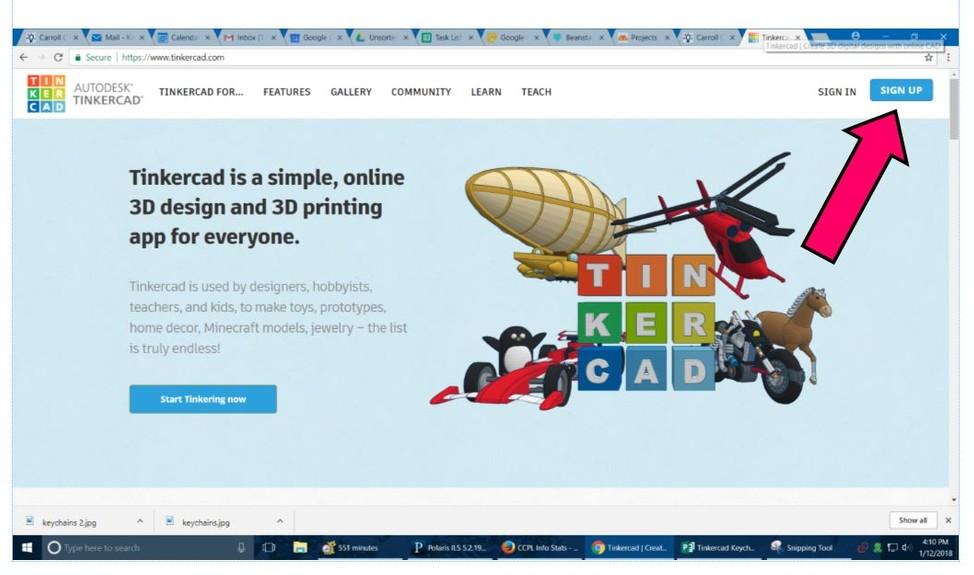
Step 2 - Create a Tinkercad account
Open a browser window and go to www.tinkercad.com and create and account using your email address.
INSTRUCTOR TIP:
For a group or classroom setting, instructors can set up a generic account and participants can log in and create their own project.
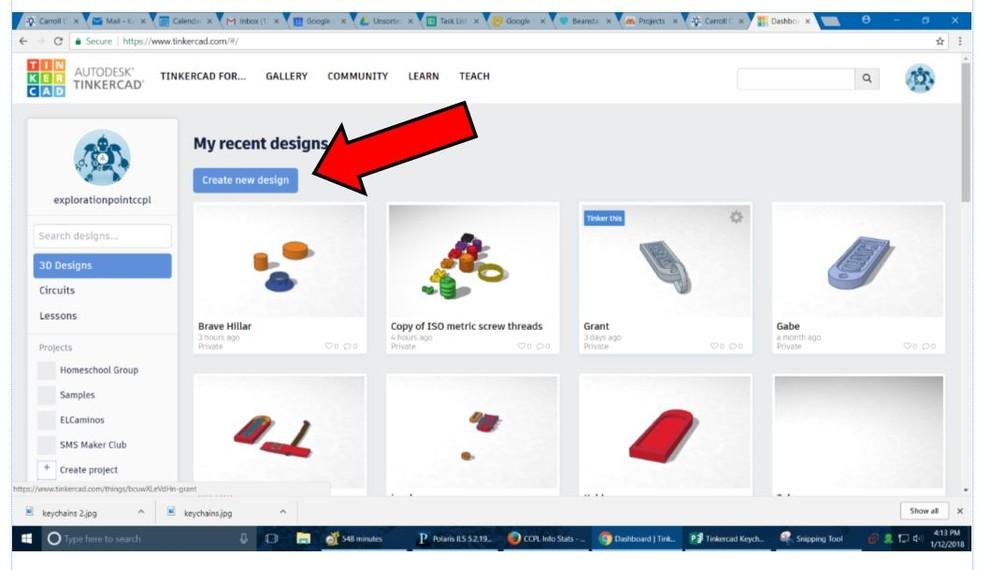
Step 3 - Start a new design
Click on “create new design”.
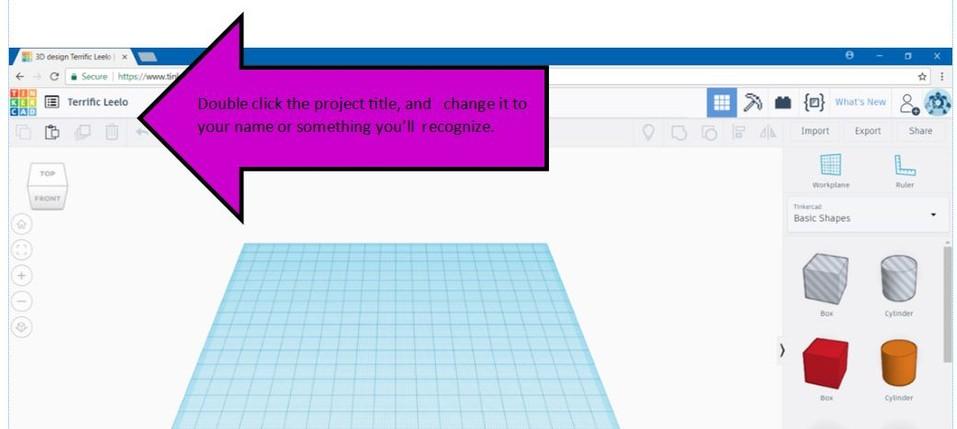
Step 4 - Rename Your Design
Double click the project title, and change it to your name or something you’ll recognize.
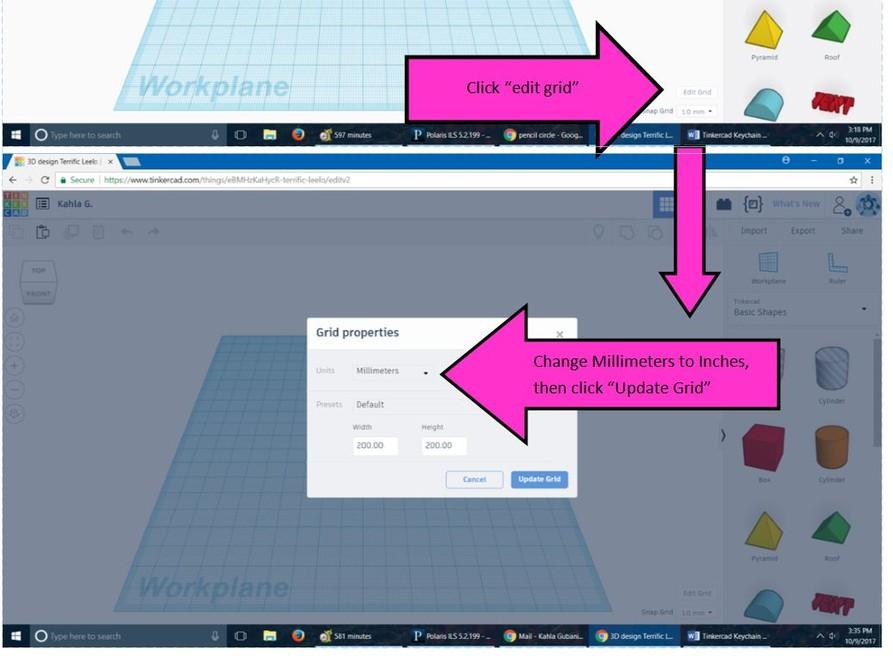
Step 5 - Edit the Workspace
Click “edit grid”. In the popup window, change Millimeters to Inches, then click “Update Grid”.
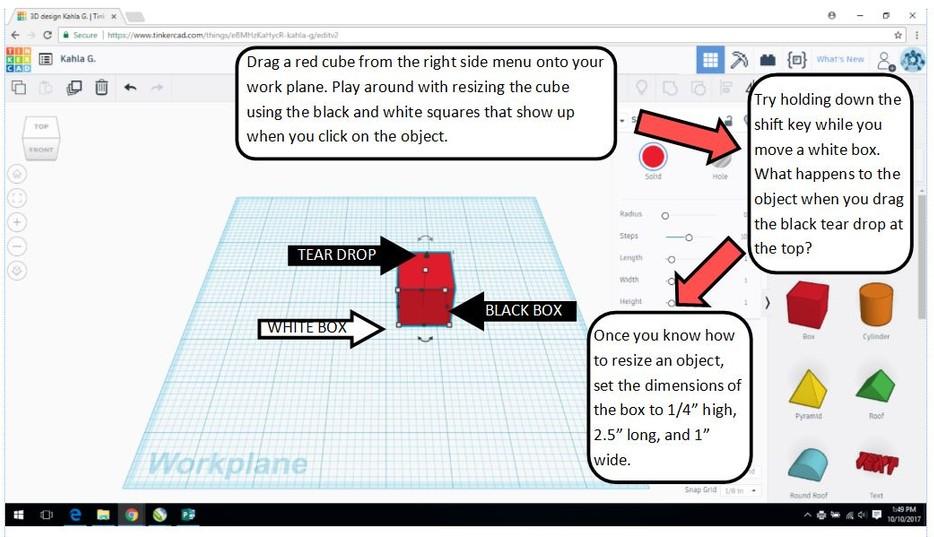
Step 6 - Drag & Resize a Cube
Drag a red cube from the right side menu onto your work plane. Play around with resizing the cube using the black and white squares that show up when you click on the object.
Try holding down the shift key while you move a white box. What happens to the object when you drag the black tear drop at the top?
Once you know how to resize an object, set the dimensions of the box to 1/4” high, 2.5” long, and 1” wide.
Tip: Move around your work plane by right clicking and dragging. Zoom in and out using the roller ball on your mouse. What happens when you hold down the shift key while right clicking and dragging?
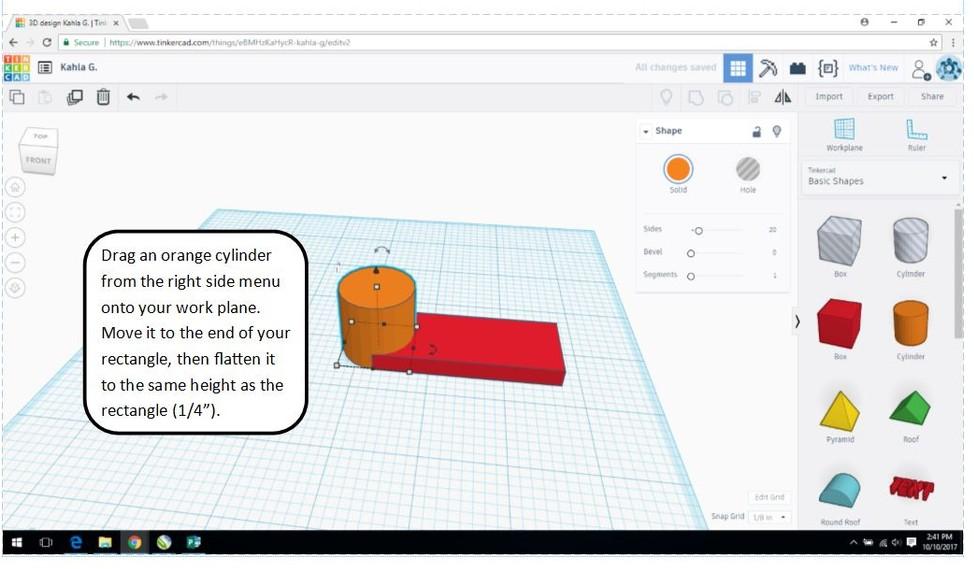
Step 7 - Add a Cylinder
Drag an orange cylinder from the right side menu onto your work plane. Move it to the end of your rectangle, then flatten it to the same height as the rectangle (1/4”).
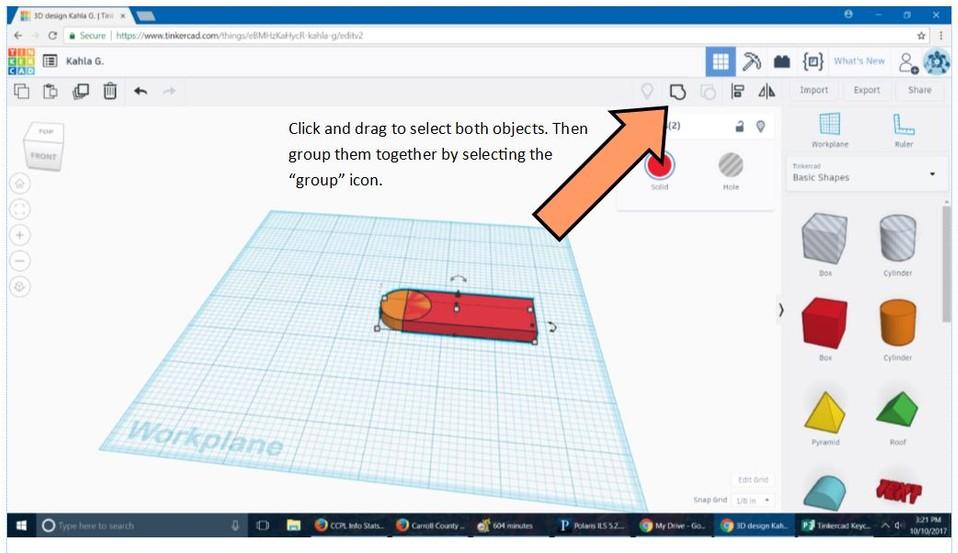
Step 8 - Group Objects Together
Click and drag to select both objects. Then group them together by selecting the “group” icon.
Tip: You can also select multiple objects by clicking on one, then holding down the shift key and clicking on the other.
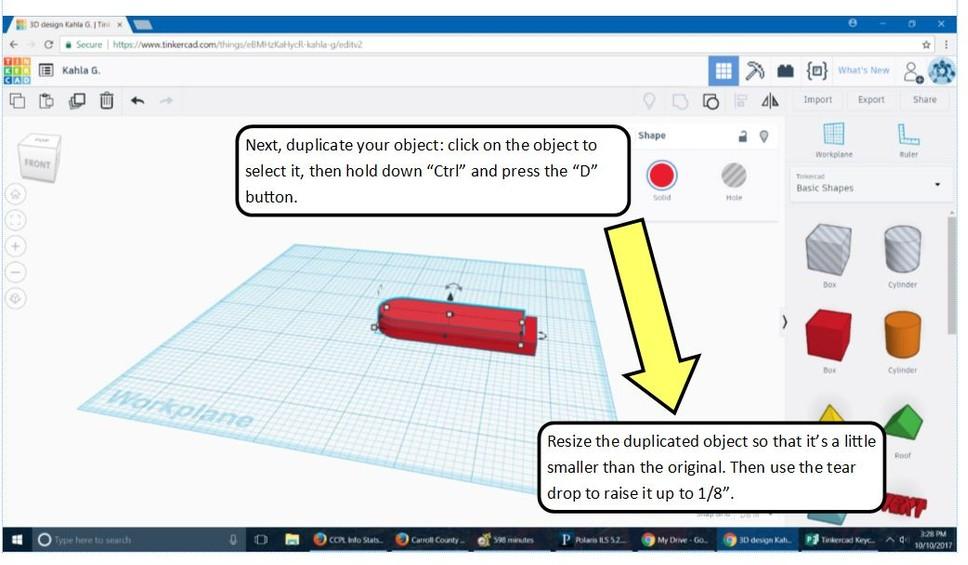
Step 9 - Duplicate Object
Next, duplicate your object: click on the object to select it, then hold down “Ctrl” and press the “D” button. Resize the duplicated object so that it’s a little smaller than the original. Then use the tear drop to raise it up 1/8” off the workspace.
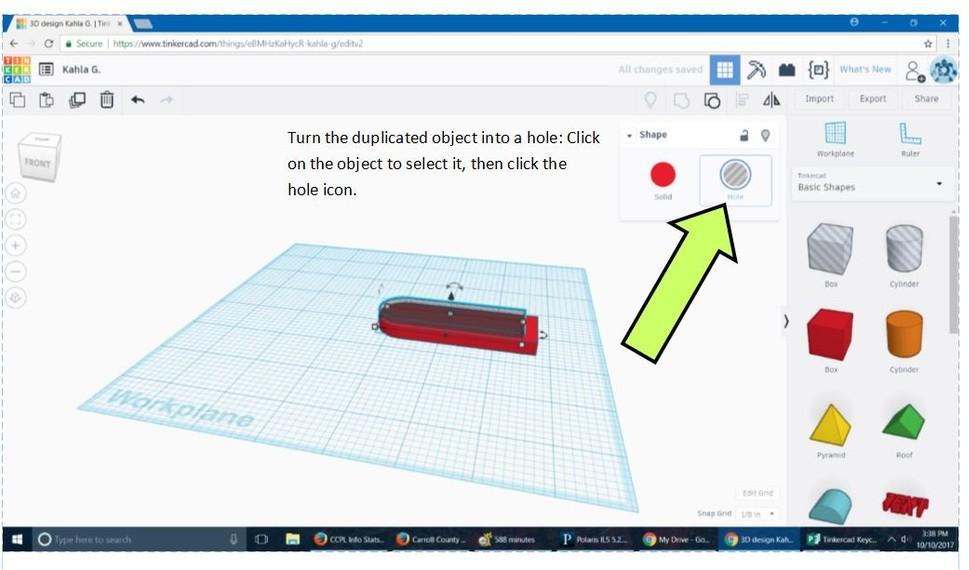
Step 10 - Create an Indent
Turn the duplicated object into a hole, which will be the indented part of your keychain: Click on the object to select it, then click the hole icon.
Tip: When you make a mistake, hit “Ctrl” + “Z” to undo! You can go backwards multiple moves by hitting Ctrl+Z more than once.
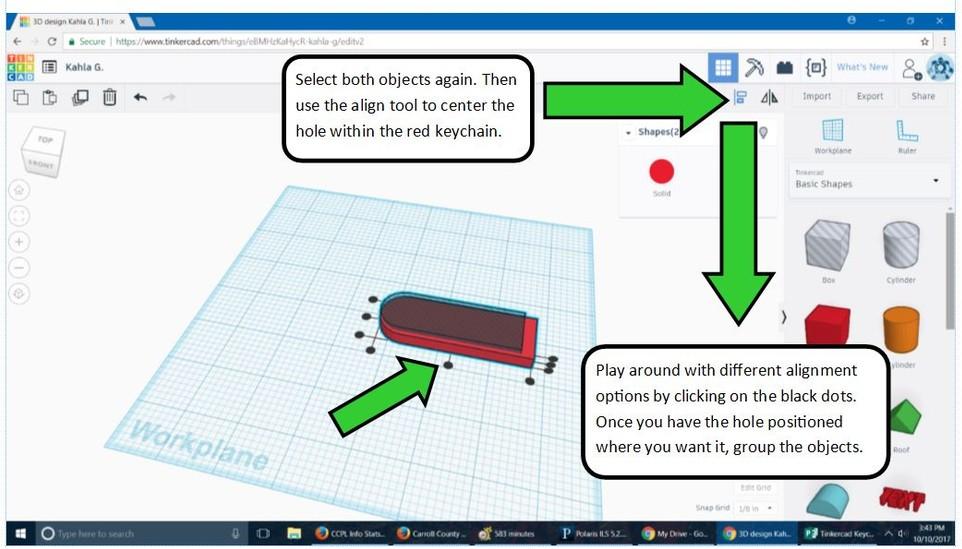
Step 11 - Align Objects
Select both objects again. Then use the align tool to center the hole within the red keychain. Play around with different alignment options by clicking on the black dots. Once you have the hole positioned where you want it, group the objects.
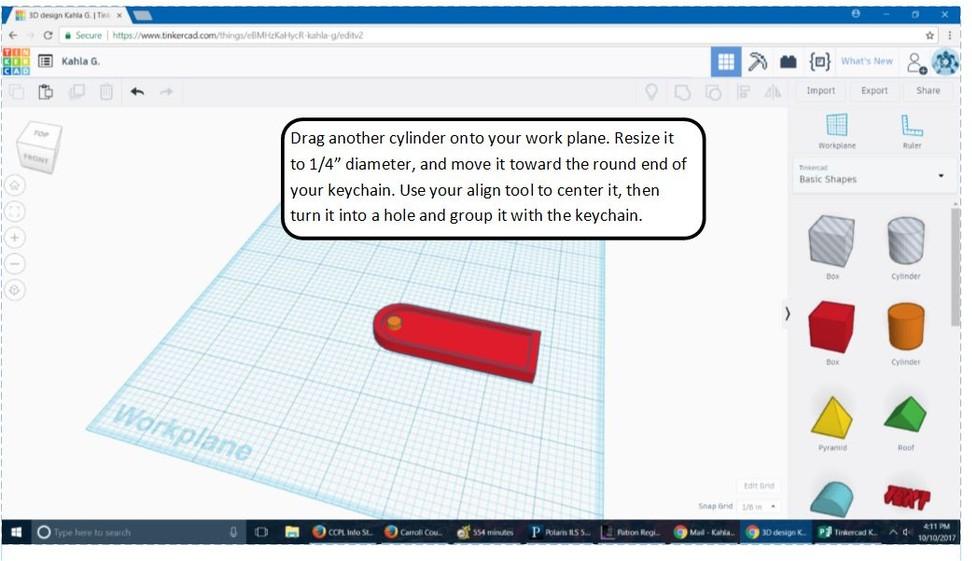
Step 12 - Create a Hole
Drag another cylinder onto your work plane. Resize it to 1/4” diameter, and move it toward the round end of your keychain. Use your align tool to center it, then turn it into a hole and group it with the keychain.
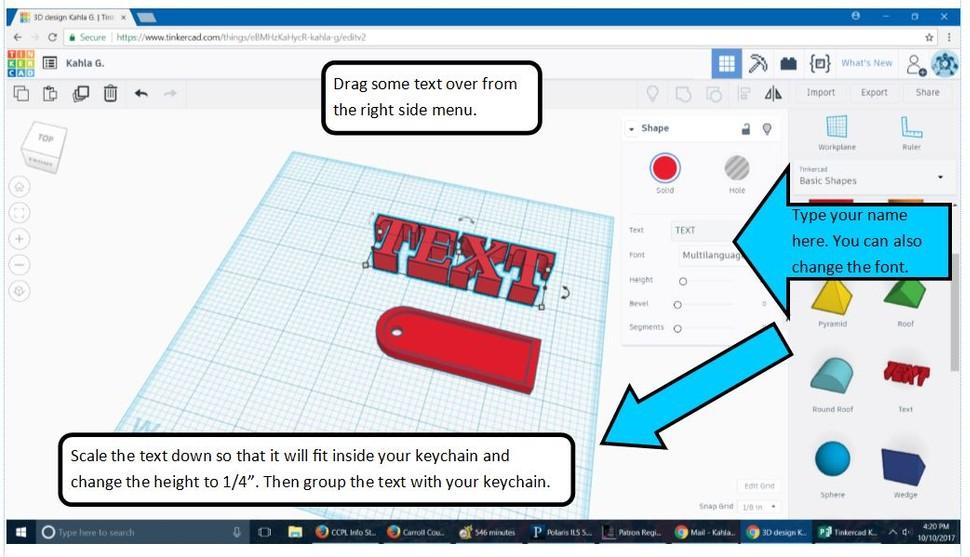
Step 13 - Add Text
Drag some text over from the right side menu. Type your name into the popup box. You can also change the font. Scale the text down so that it will ft inside your keychain and change the height to 1/4”. Then group the text with your keychain.
Congratulations! You’ve designed a 3D keychain in Tinkercad.
Now you can explore, be creative, and discover what else you can make in Tinkercad! If you want to download your design so you can 3D print it, go on to the fnal step.
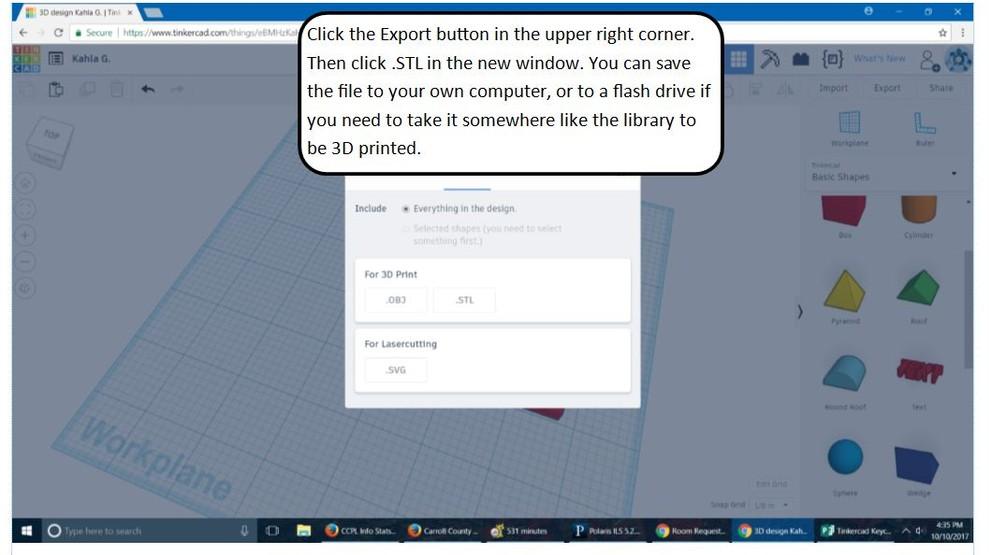
Step 14 - Export Your Keychain for Printing
Click the Export button in the upper right corner. Then click .STL in the new window. You can save the fle to your own computer, or to a flash drive if you need to take it somewhere like the library to be 3D printed.