
Self Portrait Collage
Self Portrait Collage
A Lesson Submitted by Marilyn Stadler and Cathy Harrington. With a link to the Copyrighted Dick Blick Lesson Plan “Changing Faces” www.dickblick.com

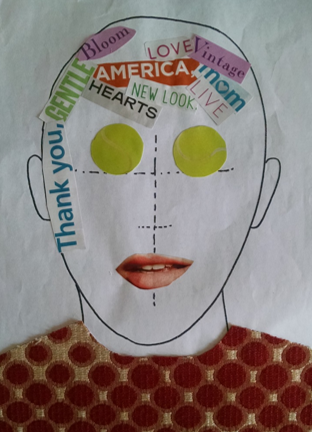
Example
Objectives:
The participants will:
1. Build upon the concept of creating simple collages
2. Reflect upon themselves—their strengths, weaknesses, talents, etc.
3. Use clippings of words and other materials or images to create a self- portrait
4. Share insights about the art created with others
Audience:
This lesson would be suitable for upper elementary ages to senior citizens. This activity could also be used in therapy sessions with a trained therapist/counselor to help clients reveal their true self-image.
Supplies/Materials:
- 9x12” pieces of Masonite for each participant or other suitable paper base
- Glue Mixture: 3 parts white glue to 1 part water
- Glue gun and glue sticks
- Pencils
- Disposable bowls (one for each participant) to hold glue at their work station
- A pitcher to replenish glue for participants during the class
- Damp towels for each student to clean hands
- Scissors
- Face template (see below)
- Magazine pages with words, facial features (such as eyes, ears, noses, etc.)
- Participants’ envelopes of words (see “Assignment for Participants” below) plus extra envelopes of words the facilitator prepares as a supplement to what the participants bring to class.
- Yarn, string, elbow macaroni or any materials that could be used to create “hair” for the self-portrait (optional)
- Fabric to create “clothes” for the self portrait
- Index card and pen/pencil/sharpie for each participant
- Masking tape
- Cleaning supplies
Assignment for the Participants Prior to the Class:
In the days leading up to the class, ask the participants to look through newspapers, magazines, advertisements, etc. and cut out individual words and/or phrases in various styles and types of print. The words they select can be random but their self-portrait will have more meaning if the words they select have some significance to their lives, dreams, hopes, fears, etc. The more words the participants have clipped and bring to the art session, the easier it will be for them to create their self-portrait. The words can be all black and white or color—whatever the participant desires. (Note to Facilitator: if cutting out the words will be too much of a challenge for the participant because of physical challenges, you can provide envelopes of words already prepared for your participants.)
Prior to the Class:
- Have a station set up for each participant which includes the base for their collage, a bowl for glue (or glue sticks), damp towels for cleaning hands, pencil, face template, scissors, envelopes with the participants’ words.
- Have a second station set up that will be used by all the participants which includes additional magazines and printed materials (to be used for finding additional words, embellishments or facial features) as well as yarn, string, elbow macaroni, ribbon, fabric, costume jewelry, etc.
- You may want to have a glue gun heated and ready for those students who wish to add three-dimensional embellishments to their self-portrait.
Class Instruction:
1. Tell the participants about the art they will be creating using the basic art form of college they’ve already learned.
2. If available, show some examples of self-portrait collages, especially the collages you and your assistant(s) made.
3. Using the template, ask students to trace a face on the base they are using for the collage.
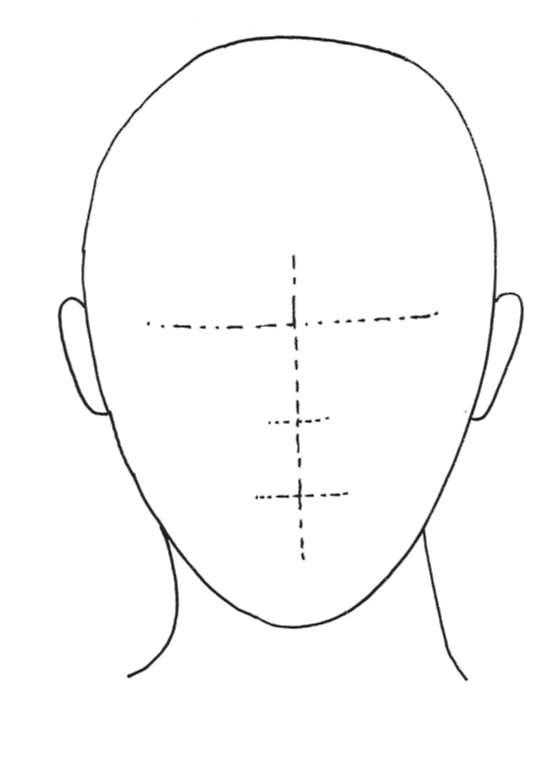
Template
4. Standing in front of the class with your baseboard (with the face traced upon it) apply the first words to begin your self-portrait, starting with the eyes, nose and mouth. You can either use a glue stick or the glue mixture.
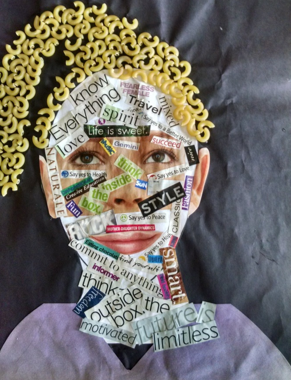
Example 2
5. Have the students create these three features on their own base boards.
6. Next demonstrate to the participants how to fill in the cheeks and face, and finally the hair.
7. Encourage the participants to use the resource table for additional materials and embellishments they may wish to add (pasta yarn, etc.).
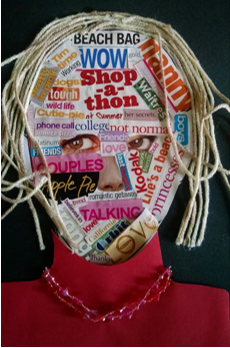
Example 3
8. Give the participants the choice of using their words or other materials provided to create the hair. The participants can also use images of facial features for their creations in addition to the words (e.g. adding images of eyes, lips, etc., found in magazines).
Example 4
9. Circulate around the room to answer questions and give encouragement but, for the most part, just leave the participants to create their art.
10. Encourage the participants to incorporate “clothing” and possibly jewelry into their creations.
11. Provide additional materials to any participants who may have time and wish to create an additional collage.
12. Allow the collages to dry overnight before getting them ready for display or returning them to the participants.
13. Use thinned-down glue or Modge Podge to coat and preserve the final creations.
At the Conclusion of the Class:
Ask each participant to share their artwork with the rest of the class, explaining their selection of the words included in their art and the meaning behind them. Encourage them to talk about the artistic process but also about how their self- portrait could help others to understand more about the artist.
Note to Therapists/Counselors:
If you would like to direct the focus of words/phrases used for this project (e.g. “safety”, “good choices”, etc.), you can use word processing and print out the phrases you think would help the participant using a variety of fonts, colors and sizes.
Adaptions and Extensions:
Check out Dick Blick’s lesson plan “Changing Faces” . With this fun project, facial features become puzzle pieces that can be changed over and over again. It’s a light and humorous way to examine the endless variety found in human faces and skin tones. This lesson is designed for Grade K to adult.