
Resist Painting
Resist Painting
A Lesson Developed by Anna Alcalde
Objectives:
1. To learn about the art method of resist
2. To create a painting using the art resist method
3. To use the art elements of line, color and negative and positive space to create art and manipulate art materials
Audiences:
This lesson would be appropriate for all ages—children to senior citizens.
Learning Opportunities (Optional):
Resist techniques in art use the incompatibility of two mediums to create layered effects with color and texture. In cooking, you’ve heard the old saying that “oil and water don’t mix”? The same is true as far as resist painting is concerned. The fact that oil or wax and water don’t mix can be used when painting to mask out areas to retain color beneath as well as create interesting textures.
How does it work? When you use wax or oil (as simple as wax from a candle, crayons or oil pastels) to draw on a piece of paper then wash over it with water- based paint (such as watercolor paint), you will find where there is wax or oil, watercolor paint will be repelled—it will either run off or collect in little droplets. Since you won’t have to carefully paint around highlights using this method, you can paint over the entire sheet of paper with your watercolors being confident your wax/oil design will not be covered.
This same concept is used in the art form of Batik where fabric and wax-resist dyeing are used to create beautiful patterns. The tradition of making Batik is well known in Indonesia but is also popular in Nigeria, China, India, Malaysia, the Philippines and Sri Lanka. Wax resist dyeing of fabric existed in Egypt in the 4 th Century BC where it was used to wrap mummies. Versions of Batik could also be found in African art where beeswax was used as a medium.
Source: www.wikipedia.org/wiki/Batik
Supplies/Materials:
- Thick cardstock sheets (whatever size is desired) in whatever colors desired—this lesson used a 8x10” light gray cardstock sheets (Note: since the paper used for this project will soak up water, heavier cardstock is advised)
- Oil pastels for each participant (Note: Crayons could also be used but the oil pastels glide easier and are good for those participants with limited dexterity)
- Watercolor paints for each participant
- Paper towels for blotting
- Paint brushes that will hold paint (“mop-top” brushes are ideal)
- Small water dishes
- Aprons/shirts for all participants
Note: Once you’ve chosen the subject you’d like your students to use as the theme for their art, it’s a good idea to bring along photos, paintings, etc. of that subject for the participants to examine and use for inspiration. In her lesson, Anna used flowers in a container as the theme for the art and brought laminated pictures of flower arrangements as well as paintings of flowers created by Van Gogh and Claude Monnet.
Prior to Class:
Make sure the table tops are covered for protection. Set up individual stations for each participant that will include an apron/shirt, water dishes with a very small amount of water, oil pastels, brushes, water colorsand the thick cardstock. Setting up the stations so that the materials are on the dominant side (right- handed or left-handed) of the individual will make it easier for them to reach their materials and not have to “reach across” themselves.
Class Instruction:
1. Tell the participants about resist painting and give a little background information. Show an example of resist paintings they will be creating.

Example
2. Talk with the participants about the subject—in this case, flowers. “Did you have a flower or vegetable garden? Did you ever give or receive flowers as a gift? What are your favorite flowers? What kinds of containers can be used for bouquets of flowers—vases, coffee cups, jars, watering cans?”
3. At the front of the class, demonstrate using the oil pastels to create a container of some kind for the bouquet you’ll be making. Sometimes it’s helpful to limit the number of colors from which to choose to cut down on stress for the participants.
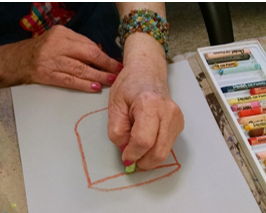
Drawing
4. Ask the participants to draw their containers onto the paper. Emphasize the feel of the oil pastels as they are applied to the paper—they glide smoothly and easily across the paper.
5. Next, demonstrate adding stems to the vase, picking an appropriate color. You can also add leaves if desired. Encourage the participants to decorate their containers with designs and colors, all using the oil pastels.
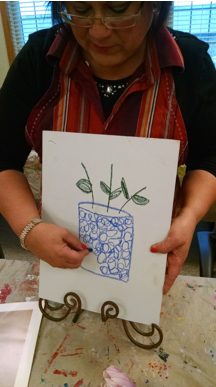
Drawing2
6. Next show the class how to add various flowers to the painting using the oil pastels. Some of the flowers may be at the end of the stems, others will be tucked into the bouquet—fill up the vase. Once the bouquet is completed, concentrate on the background. Draw a line across the page behind the vase to give the impression of a table top. In the upper background of the picture, you can make “wallpaper” designs. In the lower part of the picture, you can draw in a table cloth.
Drawing 3
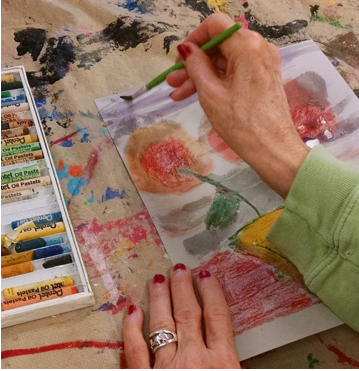
7. Once the picture has been completed using the oil pastels, it’s time to start the resist wash. Put a small amount of water into the watercolors and select brushes (mop-top) to be used.
8. Dip the brush into the pastel and then wash over the surface of the picture as desired, filling up the empty spaces with color.
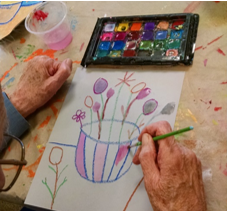
Drawing 4
9. The participants can use one color for the “wallpaper” and another for the “table cloth”—whatever they desire. Point out that the paint will not stick to the oil pastel images.
10. An alternative is to wash over the entire surface of the picture with water using a brush (called wet on wet) and then dab on watercolor paint as desired. The paint will diffuse and spread across the surface in interesting ways.
Drawing 5
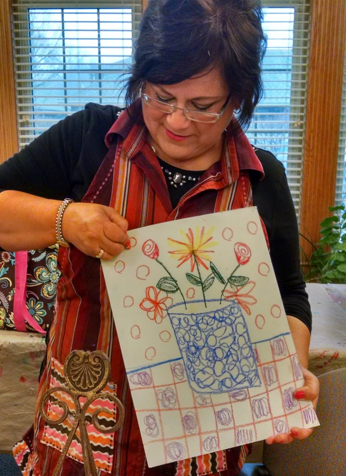
11. Once the participants are satisfied with their art, the project is complete! Put the participants’ names on the back of their art and allow it to dry before sending it home with them.
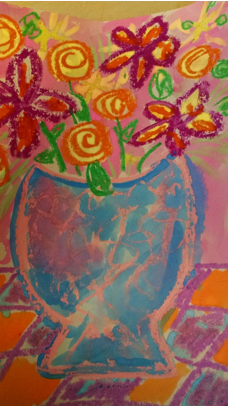
Completed example
At the Conclusion of the Class:
Have each participant hold up their art and share it with the class, eliciting memories during the sharing time. Consider having an art display of all the bouquets.
Extensions and Expansions:
An alternative to oil pastels, wax and crayons is to use dried glue as the resist element. Interesting shapes can be created and can have many applications.