
“Rapper” Art
“Rapper” Art
Collect and recycle product wrappers for a “green” art project worthy of good-citizen attention! Students save and trade wrappers to make a collage paper background. Then the background is combined with an introductory printmaking process to create a graphic design.
Students choose words and phrases related to their “rapper” collage and cut them from thin foam to create a print plate. Cut-out letters are simply turned backwards onto the plate — no intricate reverse carving into linoleum. “Rapper” Art is an easy process for making posters, book covers and signs in multiples.
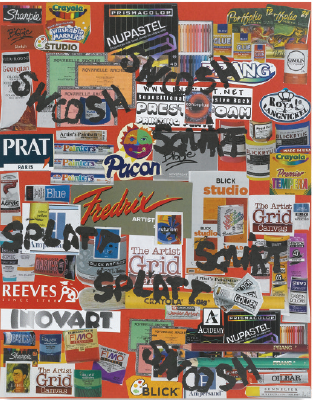
Example
Grade Levels K-6
Note: Instructions and materials based on a class of 25 students. Adjust as needed.
Process
1. Collect merchandise wrappers. Assortments are great or collect single brands or product categories. Use thin paper wrappers – no cardboard. Carefully look at the lettering used in the graphic designing of the label. It is usually simple, big and arranged in an interesting way. Select words for the printing process.
2. The Inovart Print Foam sheets are thin and easy to draw on and cut with scissors. Cut in half to 6" x 9" pieces. Draw thick letters for words directly onto one of the 6" x 9" sheets with a pencil. Make letters just as they will be read (no need to draw in reverse).
3. Cut out the letters with scissors and store pieces in an envelope until ready to arrange on the printing plate. Have students write the words on the envelope so they know how they should be arranged. Note: a trick to cutting out the “O” and others is to cut straight into the letter and cut out the hole. The shape will glue back together at the break point when attached to the print plate. Set aside.
4. Open and smooth wrappers so they are flat. Use the whole wrapper. It is a good idea to flatten the wrappers as they are collected. Keep them in a heavy book or under a brick or put them between two pieces of Kraft paper and iron.
5. Apply Elmer’s glue to the back of the wrappers and press them into the art board. When all are glued on, place a clean piece of paper on top of them and press by using a clean brayer over the top.
6. Arrange the letters on top of the second 6" x 9" sheet as they should be read. Apply the foam glue to the front or “right” side of each letter, then turn the letter over and glue in place so that it appears backwards. Very little glue is needed. These words can be cut apart in order to print each word separately on different areas of the background. They can also be printed one after the other to form a phrase or repetition – Splat, Splat!
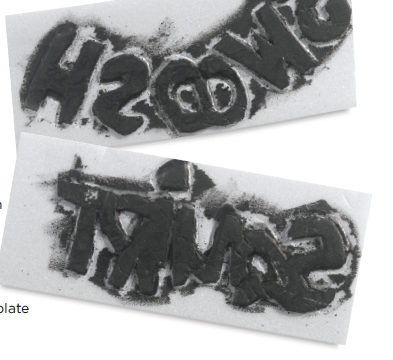
Stamp example
7. Follow printmaking procedures. Roll ink on the inking plate, when smooth brayer or roll the ink on the foam plate, turn the plate over and press on the background. Some wrappers may be slippery, so hold the plate tightly. Rub the back of the plate carefully with the palm of a hand or clean brayer. Carefully “peel” the plate from one corner and lift it off the background. Repeat the process as desired.
Options
1. Trade word plates with other students
2. Make a brand symbol with scrap Inovart Print Foam and print onto artwork
3. If plate does not print clearly, make improvement with brush and ink
Materials
- Art Board, 12" x 18", package of 8 sheets; need one sheet per student
- Printfoam for Block Printing, 9" x 12", package of 12 sheets, need one sheet per student
- Soft Rubber Brayer, 4"; share two
- Inking Plate/Bench Hook, 9" x 7"; share two
- Blick® Water-Soluble
- Block Printing Inks, 5-oz tubes: Gold; need two Black; need four
- Scissors, 12-pack pointed, (57040-2009); need one per student
- Glue-All; share six 7.25-oz bottles across class
National Standards for Visual Arts Education
Content Standard #1 — Understanding and applying media, techniques, and processes
K-4 Students use different media, techniques, and processes to communicate ideas, experiences, and stories
5-8 Students intentionally take advantage of the qualities and characteristics of art media, techniques, and processes to enhance communication of their experiences and ideas
Content Standard #2 — Using knowledge of structures and functions
K-4 Students use visual structures and functions of art to communicate ideas
5-8 Students employ organizational structures and analyze what makes them effective or not effective in the communication of ideas
Content Standard #3 — Choosing and evaluating a range of subject matter, symbols, and ideas
K-4 Students select and use subject matter, symbols, and ideas to communicate meaning
5-8 Students integrate visual, spatial, and temporal concepts with content to communicate intended meaning in their artworks