
Paper Quilling
Paper Quilling
Linked with Permission from Ann Martin www.allthingspaper.net and Cheryl Trowbridge www.teachkidsart.net and Dick Blick Art Materials www.Dickblick.com
Objectives:
The participants will
1. Learn the history of quilling
2. Learn the techniques of quilling and the various patterns they can use to create simple designs
3. Use quilling to create art
Audiences:
This activity should be restricted to those who can safely use and manipulate the tools necessary for quilling.
Learning Opportunity:
The art form of quilling answers to many names: paper rolling, paper scrolling, paper filigree or mosaic. Whether quilling originated in ancient Egypt or China in 105 AD when paper was invented, the art form has a rich and fascinating history. In the 300’s and 400’s, silver and gold wire (known as metal filigree) was used to adorn pillars, vases and jewelry using the quilling technique. When metal became scarce, paper was substituted as the materials used for quilling which made the art form affordable and accessible to the masses. Quilling really came into its own in the 1500’s and 1600’s when French and Italian nuns used the torn edges from guilt-edged bibles and goose feathers to quill and decorate religious articles and picture. In the 1700 and 1800’s, quilling, along with needle point, were popular hobbies taught to young ladies. Although it was not typically practiced by working-class women, quilling eventually found its way to America where it was embraced and enjoyed by settlers. Today, with the advent of scrapbooking and card making, quilling has found resurgence.
Sources: http://quilling-guild.weebly.com/the-history-of-quilling.html
http://www.mypaperquilling.com/paper_quilling/history_of_quilling.php
“A Quilling Tutorial” Re-Posted with Permission by Ann Martin
http://www.allthingspaper.net/p/tutorials.html
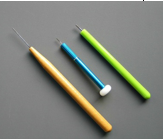
Quilling tools
Quilling Tools: left to right: needle tool, ultra-fine slotted tool, slotted tool
The Basics of Quilling
The projects in this article feature the teardrop coil, but there are many other intriguing shapes to try — marquises, arrowheads, holly leaves, and all sorts of beautiful scrolls, just to name a few.
Basic Shapes of Quilling
Supplies/Materials:
- Quilling paper: 1/8″ is the standard width
- Quilling tool needle tool or slotted tool
- Ruler
- Scissors
- Tweezers
- Glue clear-drying, suitable for paper
- Plastic lid to use as a glue palette
- T-pin, paper piercing tool, or round toothpick
- Glass-head straight pins
- Non-stick work board, cork, or Styrofoam—something into which you can stick pins
- Damp cloth to keep fingers free of glue
Class Instructions:
Quilling Basics:
1. When purchasing a quilling tool there are 2 basic types you can use: a slotted tool and needle tool. The slotted tool is easiest to use; its only disadvantage is that the slot leaves a tiny crimp in the center of the coil. If this is bothersome, purchase an ultra-fine slotted tool or try a needle tool. The needle tool is a bit more difficult to master, but the reward will be a coil with a perfectly round center.
Slotted Tool
2. To roll a coil with a slotted tool: Slide the very end of a strip into the slot, and turn the tool with one hand while evenly guiding the strip with the other.
3. To roll a coil with a needle tool: Dampen fingers and curve one end of a strip across the needle. Roll the strip around the needle with the thumb and index finger of whichever hand feels most comfortable, applying even, firm pressure, while holding the handle of the tool with the other hand. Be sure to roll the paper, not the tool.
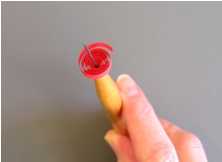
Coil Example
4. Whether using a slotted tool or needle tool, when the strip is fully rolled, allow the coil to relax, slide it off the tool, and glue the end. Use only a very small amount of glue, applying it with the tip of a T-pin, paper piercing tool, or toothpick. Hold the end in place for a few moments while the glue dries. This is called a loose coil, and it’s the basic shape from which many other shapes are made.
To create a Heart:
1. Make 4 teardrops. Roll a 12″ loose coil. Press the coil slightly between your fingers, and, if necessary, use a pin to arrange the inner coils so they are evenly spaced.
2. Pinch sharply at the tip to make a point. Glue the end and trim the excess paper.
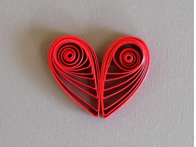
Heart Sample
3. Make 2 hearts. Place 2 teardrops side by side on the work board to create a heart shape, positioning them in opposite directions so the inner coils appear to meet. Apply glue at the join spot.
4. Hold the teardrops in place with pins while the glue dries.
“Quilled Paper Designs” Re-Posted with Permission by Cheryl Trowbridge
http://www.teachkidsart.net/quilled-paper-designs/
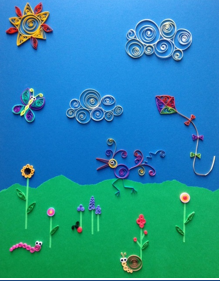
Completed Example
Supplies/Materials:
- Paper strips
- Q-tip, with the ends cut off (You can purchase a special tool with a slit at the end for rolling your paper strips, but it really isn’t necessary.)
- scissors (or simply tear the strips to the lengths you want)
- glue
- toothpick for applying small amounts of glue
Class Instructions:
Follow these simple steps to learn the basic shapes for quilling… then combine them to create fun designs of your own!
1. Cut the ends off your Q-tip and use it to roll one of your paper strips into a tight coil. (I find that rolling towards me is easiest, but that’s just personal preference.)
2. Apply a small amount of glue to the end and press it down for a few seconds.
3. Now pull out your Q-tip “quill” — you have just completed your first tight coil.
4. Roll another coil the same way, but when you get to the end, pull out your quill and release your grip just a little so your coil begins to expand. You can let it expand a lot or just a little—it’s up to you. A small amount of glue will hold it in place at the size you want. We’ll call this a loose coil.
5. Now make two more loose coils. Pinch one of them on one side to form a teardrop shape. Pinch the other one on two opposing sides to form an eye shape.
6. To make a graceful “S” curve, roll a strip halfway and release it. Then roll the other end of the strip halfway in the opposite direction and release again.
7. A heart shape is made by first folding your paper strip in half. Then roll each end in toward the middle, releasing when you get to the size you want your heart shape to be.
8. After making each of these basic shapes, it’s easy to make triangles, squares, and more.
9. Finally, use small amounts of glue to assemble your shapes into all kinds of fun designs.
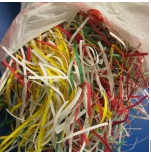
Shredded paper
Make strips fast with a paper shredder
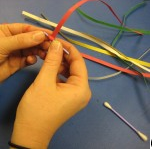
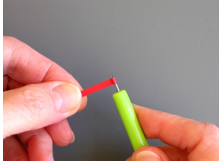
Wrapping around Q-tip
Cut ends of Q-tip to roll strips
Apply glue to end of strip with a toothpick
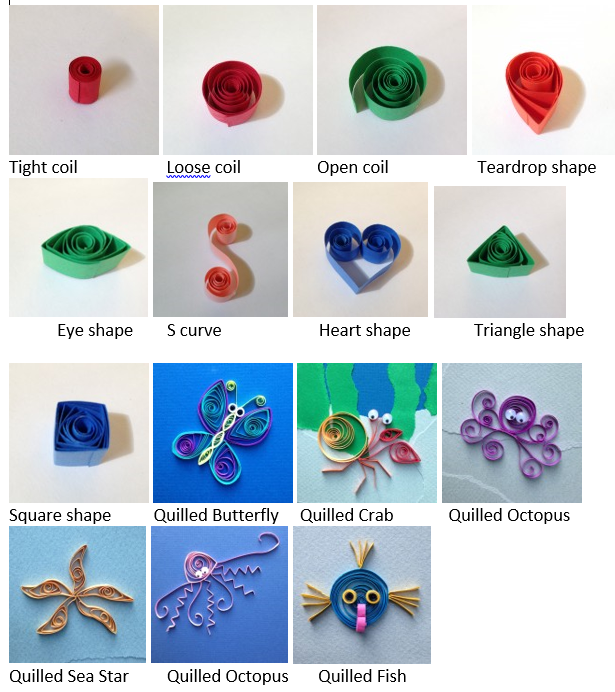
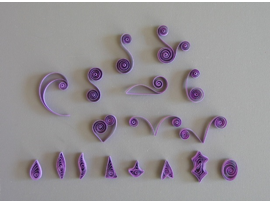
Quilling Shapes
Shapes: from Top Left: Tight coil, Loose coil, Open coil, Teardrop shape
2nd Row: Eye shape, S curve, Heart shape, Triangle shape
3rd row: Square shape, Quilled Butterfly, Quilled Crab, Quilled Octopus
Last Row: Quilled Sea Star, Quilled Octopus, Quilled Fish
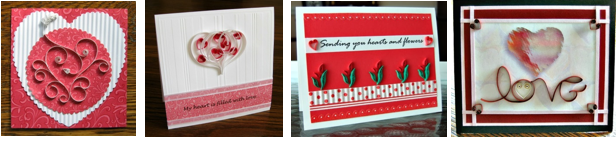
Building a complicated design with quilling can take some patience! It’s a good idea to start with a small project like a greeting card, which will help students learn new skills and experience success without feeling frustrated by a project that takes too long to complete.
Additional Projects, Resources, Tutorials and Information About
Quilling:
Please visit http://www.dickblick.com/lesson-plans/eye-popping-paper- curls/ for a free download of Dick Blick’s lesson “Eye Popping Paper Curls” Please visit Ann Martin’s blog site http://www.allthingspaper.net/p/quilling-faq.html to read Ann’s answers for a variety of questions about quilling or to purchase the book, Creative Paper Quilling, by Ann Martin.
Example
“Join Ann Martin and other Quilling artist as they share their expert techniques and helpful tips in the new and exciting book “Creative Paper Quilling”. With projects for all skill levels you will enjoy greeting cards, pendants, earrings, holiday ornaments and much more. This book also includes step-by-step instructions and an image gallery of all the shapes used in the projects. The book has 48 pages with full color illustrations and 28 brand new and exciting designs. Visit http://quillingsupply.com/item_447/Creative-Paper-Quilling-Book.htm to learn more or purchase this resource.”
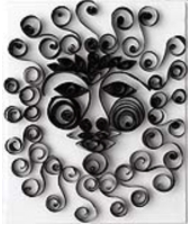
Ann Martin's Work
Visit Ann Martin’s Site: http://www.allthingspaper.net/p/tutorials.html to view tutorials to make a multitude of projects. Don’t forget to sign up for her newsletter!
Special Thanks to Dick Blick for graciously allowing Hildegard Center to link to DB lesson plans in conjunction with its “Art Bridges” Project. Dick Blick’s commitment to the educational community extends far beyond providing high-quality products at low prices. DB offers art lesson plans created for all ages and skill levels. Every project also meets several National Standards for Visual Arts education. PDF downloads and videos of these original lessons are available free of charge. Visit www.dickblick.com to see the many ways DB support schools, communities and art education and make DB your one-stop shopping destination for art supplies.