Dutch Oven Cooking
Lesson Topic:
Dutch Oven Cooking
Lesson Description:
Students will learn how to use a dutch oven while cooking in the outdoors.
Learning Goals/Outcomes:
Students will be able to use a dutch oven to cook a pizza to share with 3 of their friends. The goal is for students to know how to cook at least one thing in a dutch oven, so they can continue experimenting with different recipes in the future on outdoor adventures.
Nebraska Standards:
PE.HS.16 Outdoor Pursuits
PE.HS.16.1 Demonstrates competency in motor skills and movement patterns needed to perform a variety of physical activities.
PE.HS.16.1.a Performs and/or refines activity specific skills in a variety of outdoor pursuits (e.g.,
kayaking, paddleboarding, fishing, geocaching, orienteering, camping, hiking, mountain biking,
climbing, obstacle course, adventure activities, high elements).
PE.HS.16.2 Applies knowledge of concepts, principles, tactics, and strategies related to
movement and performance to achieve and maintain a health-enhancing level of physical
activity and fitness.
PE.HS.16.2.b Explores and participates in outdoor activities that can be pursued in the local
environment.
PE.HS.16.3 Recognizes the benefits of physical activity and exhibits responsible personal and social behavior in a variety of physical activity settings.
PE.HS.16.3.a Applies best practices for participating safely in outdoor pursuits.
PE.HS.16.3.c Evaluates the opportunities for social interaction and social support provided by outdoor pursuits.
Teacher Planning:
Equipment/Materials Needed:
**NOTE - We do not own this equipment as a school district. Nebraska Game and Parks let us borrow their supplies for the lesson today. We purchased the food and coal on our own, but they supplied everything else for the lesson. Ask people in your community if you don't have the equipment. It is likely that you can find an organization who will let you borrow their supplies.**
Six 12" Dutch Ovens (recommended - Lodge or Cabela's brands)
2-3 coal chimneys
Several (8-10) oil pans to keep the coals and dutch ovens off the ground
Welding gloves (3-4)
2-3 dutch oven lid lifters
2 Large cutting boards (big enough for a 12" pizza crust)
Pizza cutter
Pizza ingredients - pizza sauce, pepperoni, cheese, pineapples, pizza crusts, etc...
Spatulas
Paper Towels
Paper plates
Large trash bags for trash
Foil to line the dutch ovens before cooking
Time Required for Lesson:
1 hour
Diagram/Setup:
Pizza prepared and ready to cook
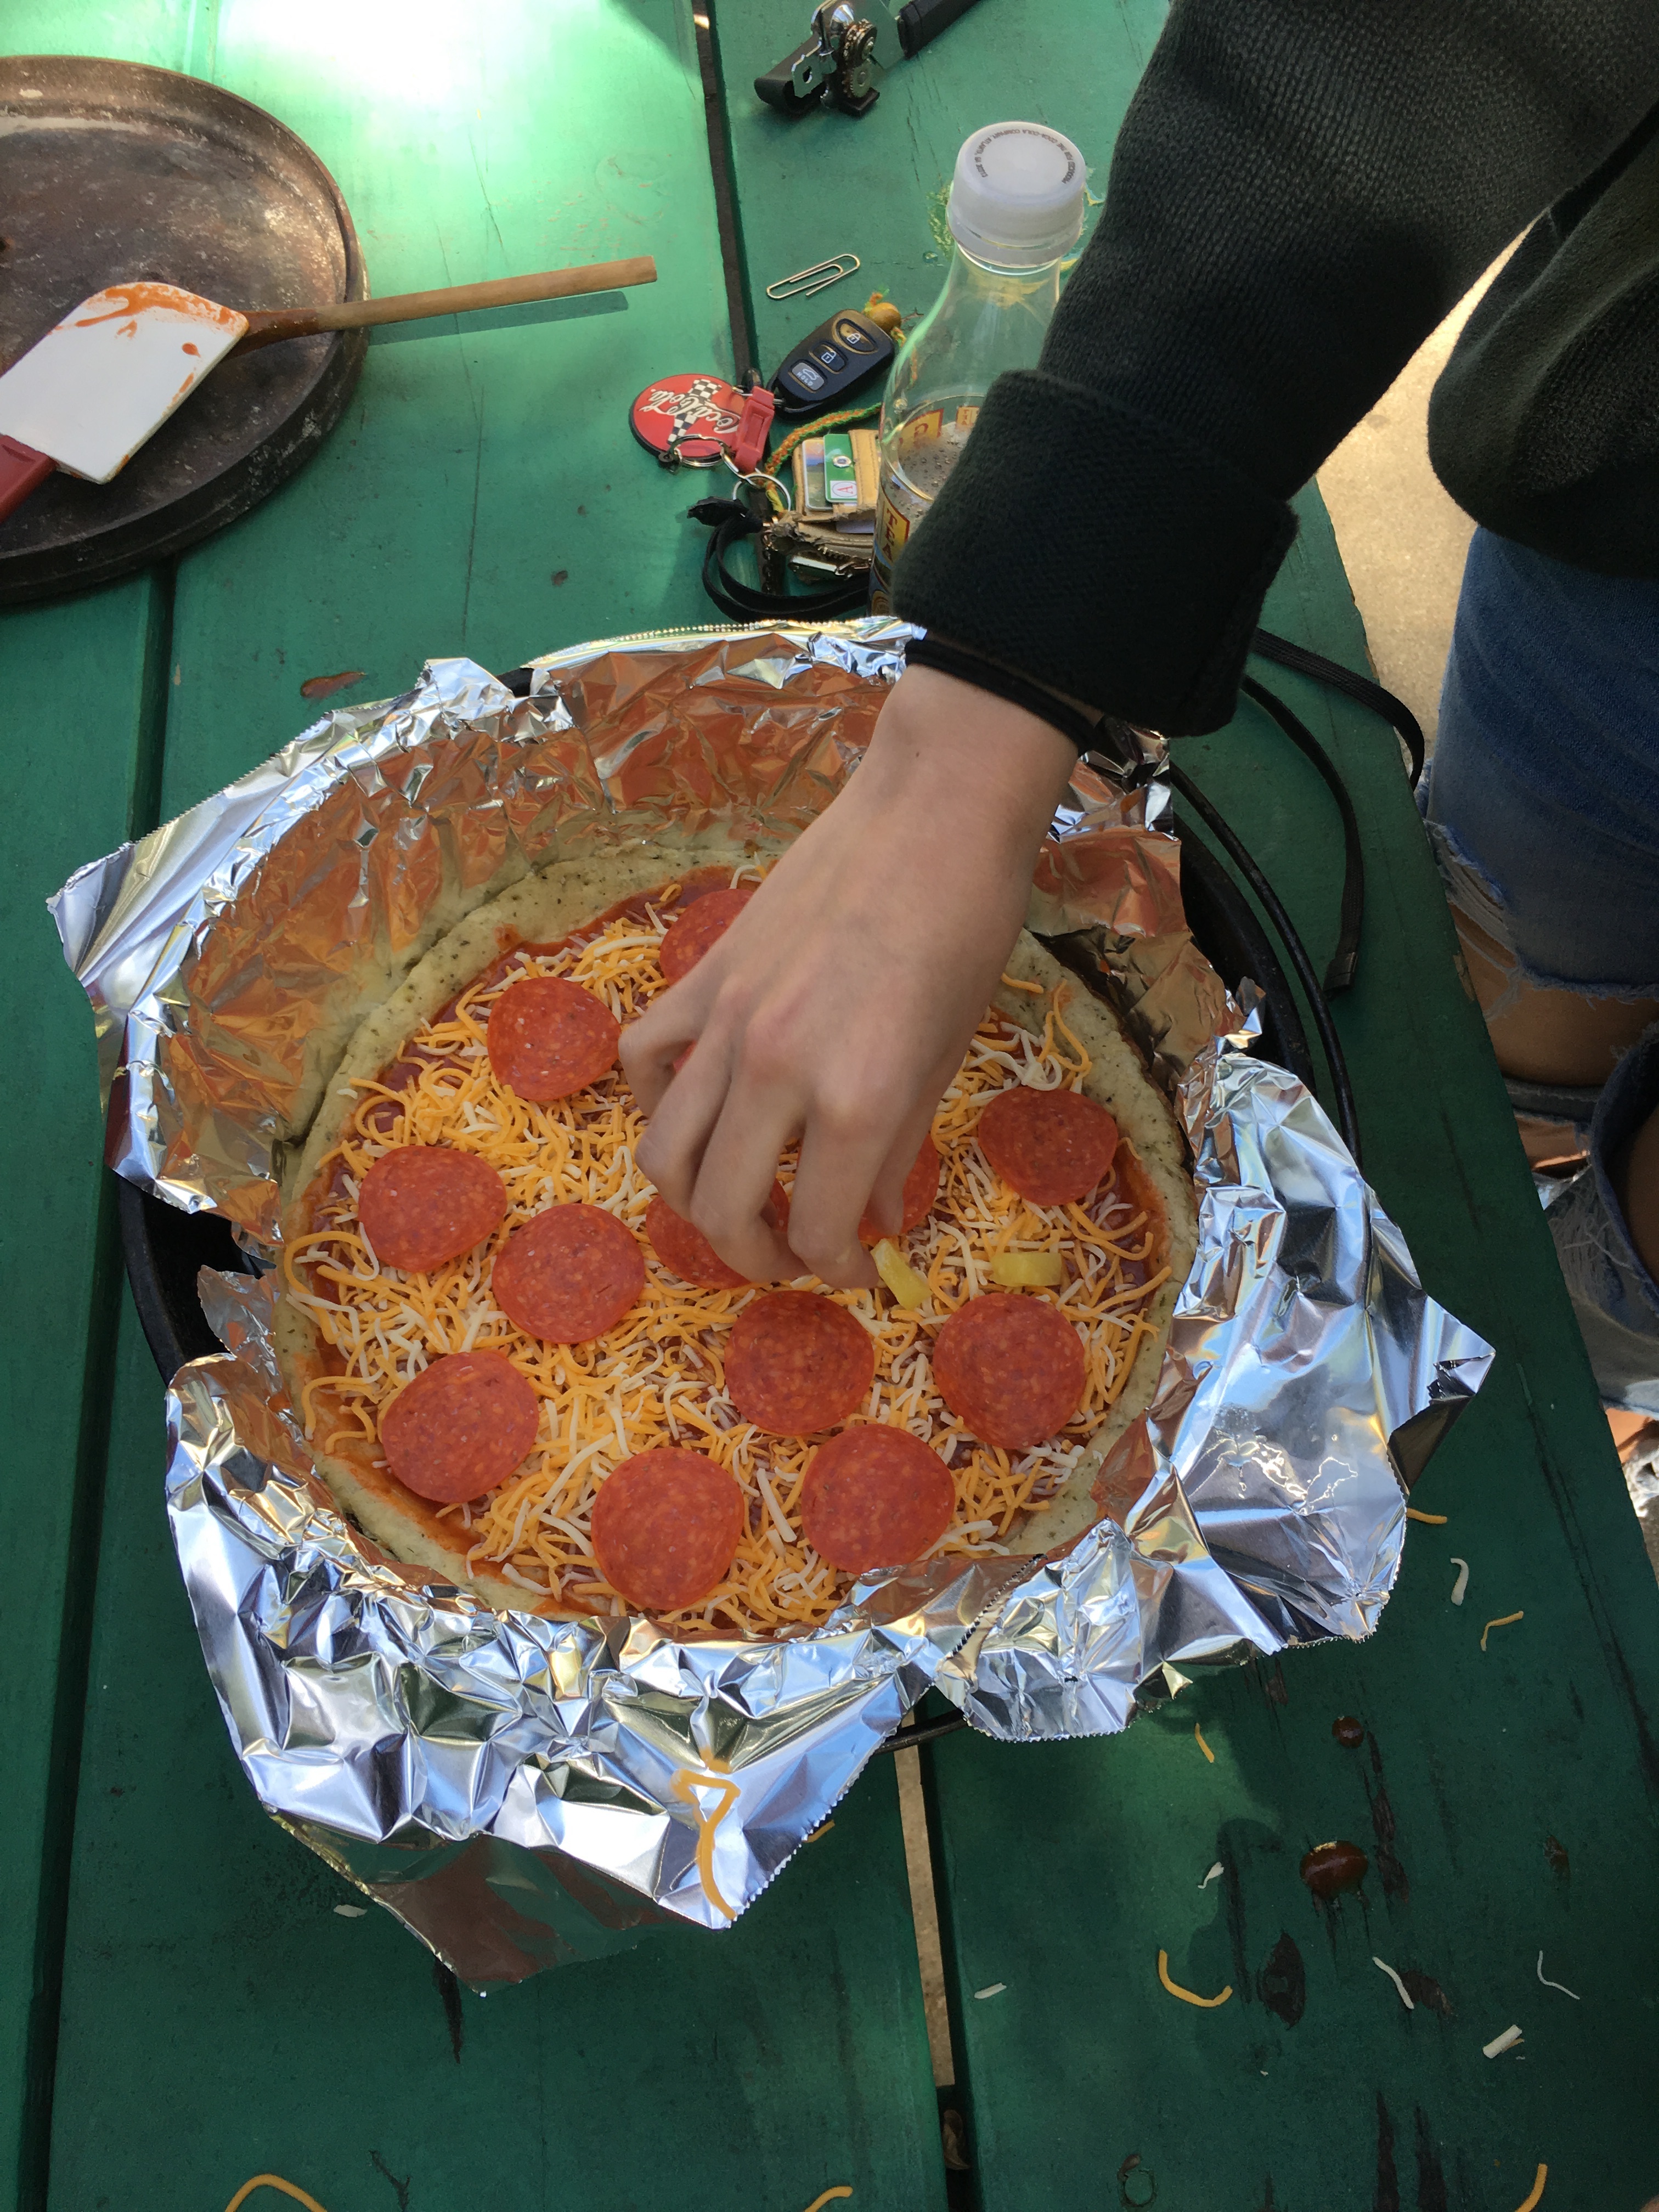
A students' pizza is ready to be cooked. The foil will be tucked inside the oven before cooking.
Pizzas Cooking in dutch ovens
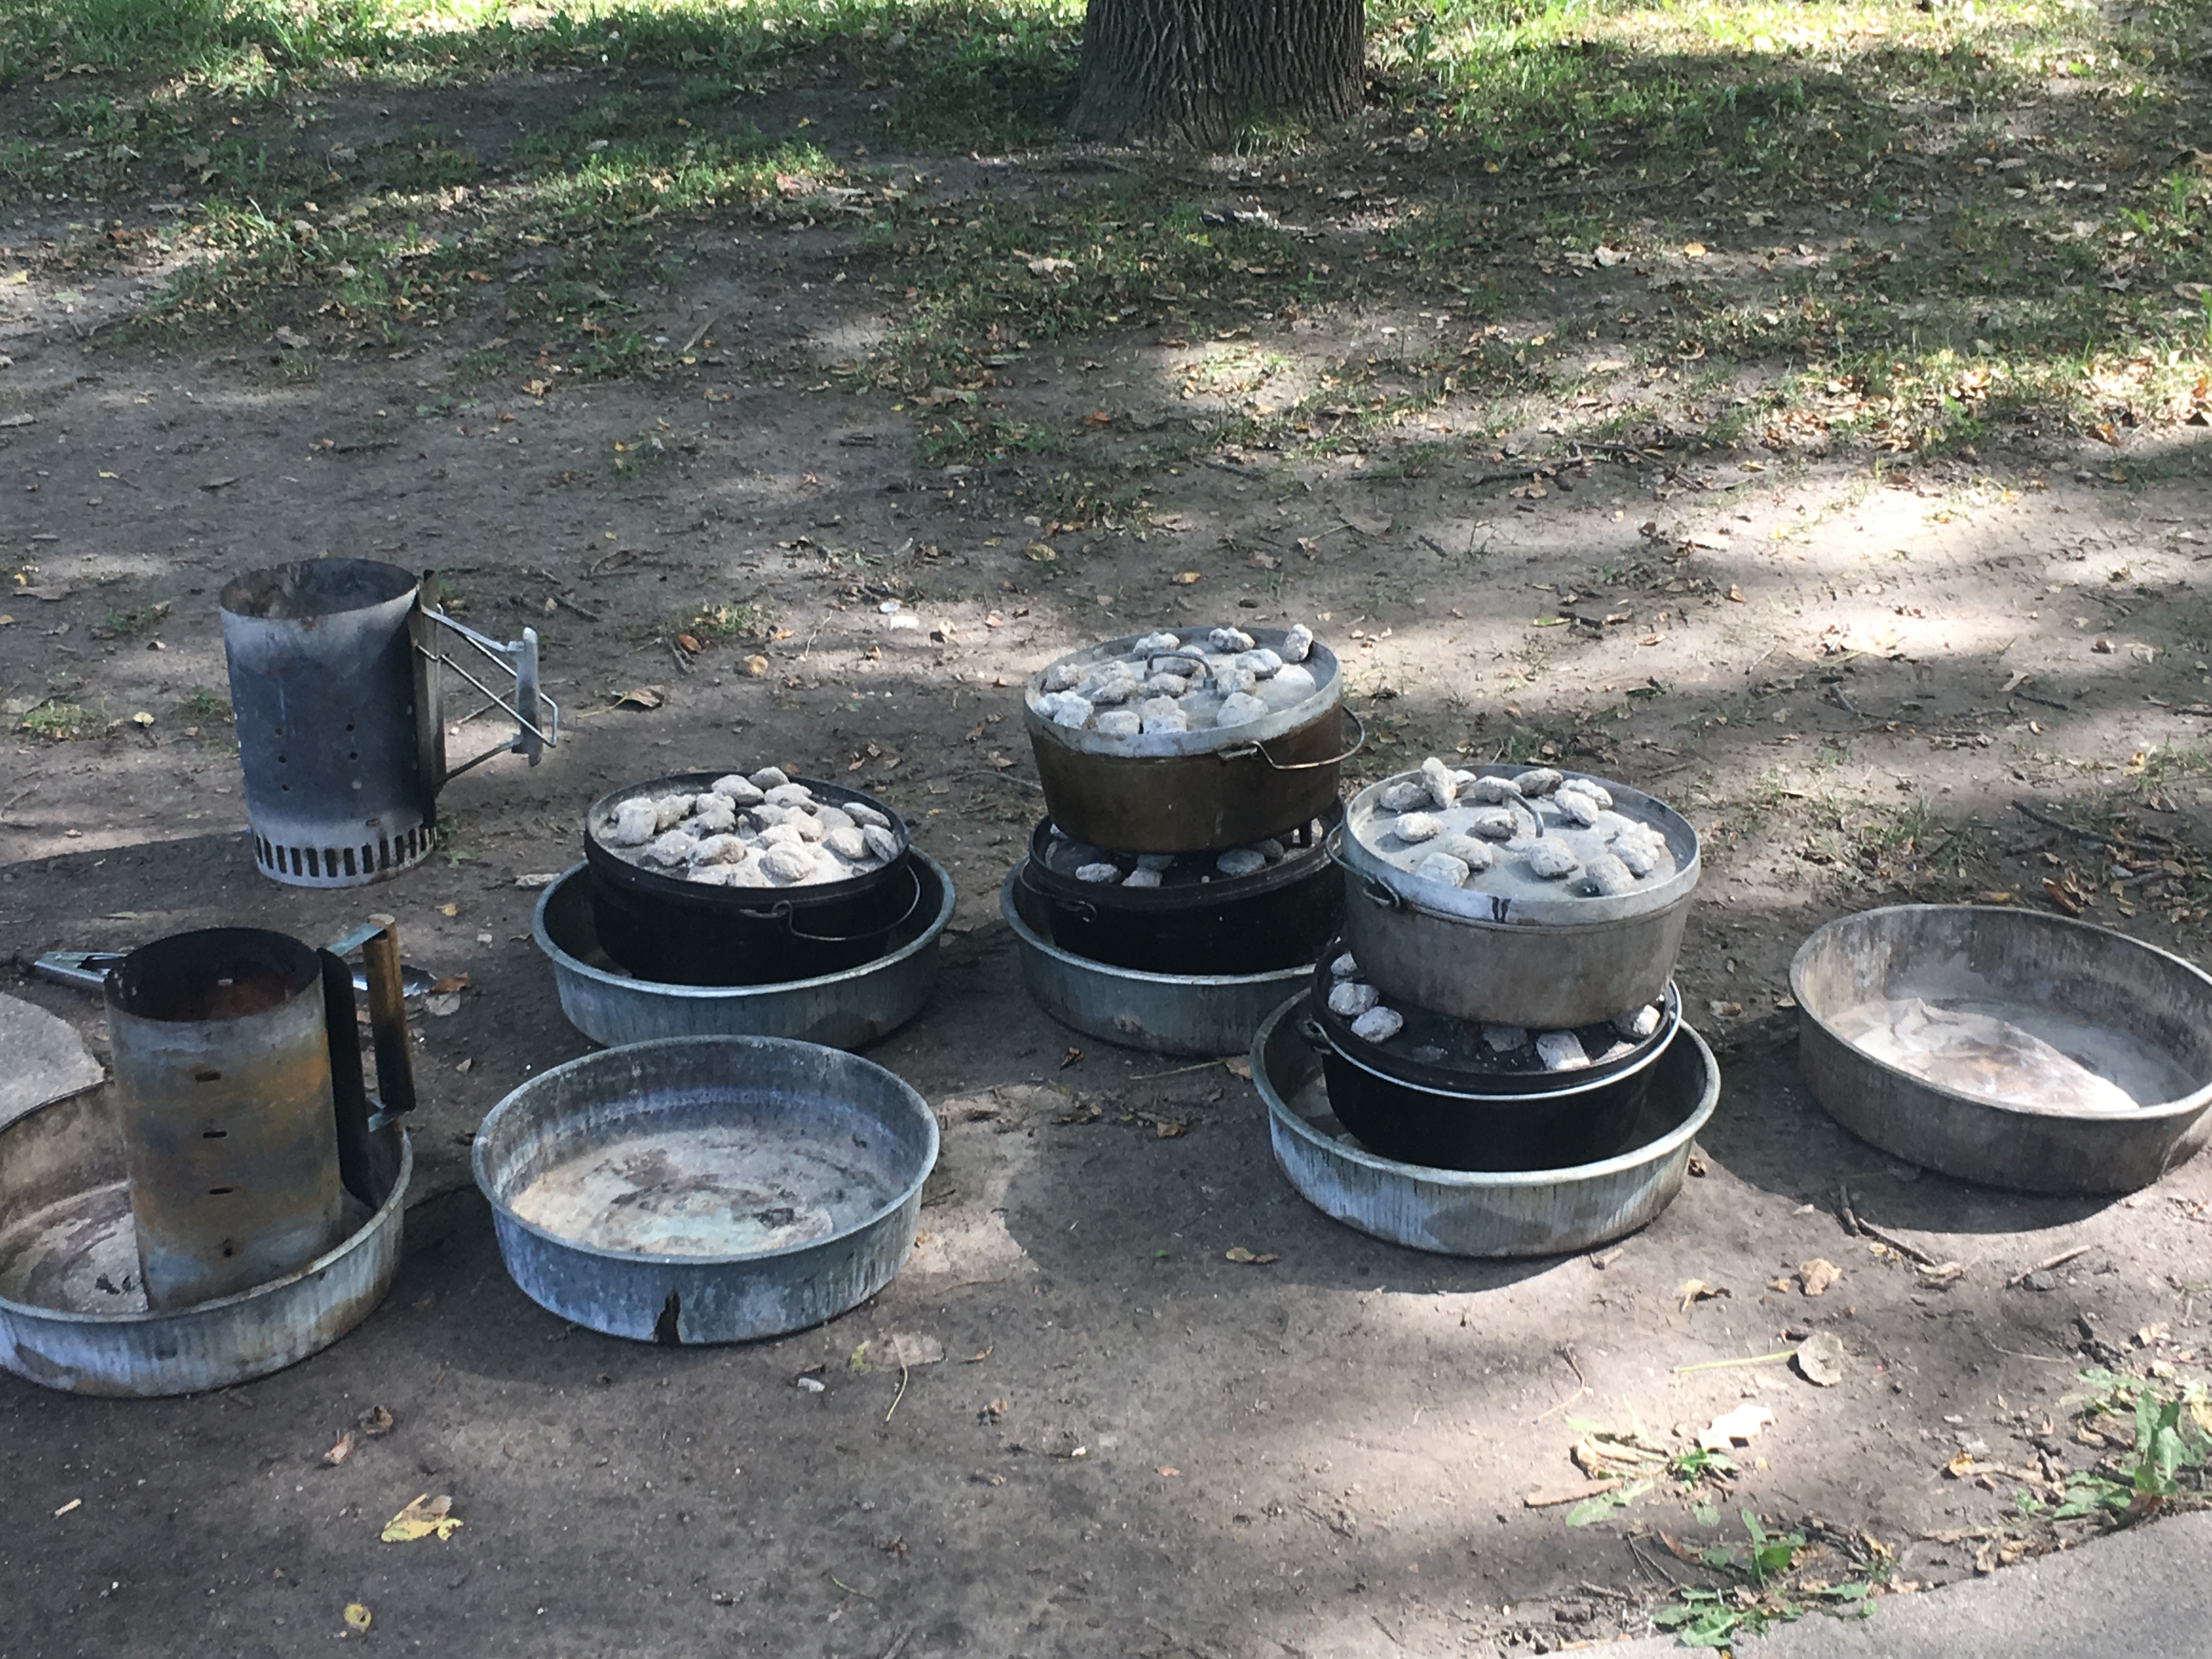
Students pizzas are cooking in the dutch ovens with chimneys nearby.
Technology Use:
_____ YES __X___NO
Instructional Plan:
Anticipatory Set/Pre-Activity:
In a previous lesson in our wilderness living unit, I showed students several ways someone could prepare food outdoors including freeze dried meals, hotdogs and s'mores over an open fire, cooking on a propane stove, and dutch oven cooking. I had asked students how many of them have prepared a meal on their own at their house, as well as how many had prepared a meal for themselves in the outdoors. They knew that we would be preparing a pizza today while using a dutch oven. Students came to the lesson ready to learn how the dutch oven works and they were excited to make pizzas that they would get to eat.
Benefits/Explanation/Real-World Connection:
Students were able to experience one way to cook food outdoors through dutch oven cooking. This hands on practice, as well as eating their pizza creation, seems to be a huge hit with the students. Many students have remarked how much they enjoyed the lesson, and many want to know when we will be using the dutch ovens again in the future to make more food. This is a great way to show students that there are many ways to prepare food while outdoors that don't include just warming up a hot dog on a stick.
Activities (i.e. instructions, warm-up, lesson, cool-down):
As students arrive to class, have them help set all the dutch ovens out and line them with foil. The foil should come up the sides of the dutch oven, but not spilling over the top. The lid needs to sit tight on the top of the oven. The foil helps keep the dutch ovens clean, and it provides an easy way to get the pizzas out of the dutch ovens when finished cooking.
When they are finished lining the dutch ovens with foil, have a few students get the chimneys started. Line the bottom with crumpled newspaper, then put coal on the top half. Fill about 3/4 full with coal. Place each chimney in an oil pan before lighting. Have a couple of students use lighters/matches to light the newspaper on fire and get the chimney going. I did this lesson in the parking lot with the administration's permission. With the oil pans under the coal chimneys, we did not burn any grass or plants during the cooking process. It takes a few minutes for the coals to get hot, so during this time the students can start putting their pizzas together.
In groups of 4, have students place a pizza crust in the bottom of their dutch oven (on the foil), then work together to spread the pizza sauce on the crust inside the dutch oven. At this point, they can use whatever ingredients are available to make their pizza. Many students put their favorite toppings on their 1/4 of the pizza, so when they cut it, they only had to eat what they wanted on their section.
Once the pizzas are ready to cook, the students will put the lids on the dutch ovens and carry the ovens over to the chimneys. I had extra oil pans sitting there ready to place the ovens in for cooking. Most of our dutch ovens were cast iron, with one or two being aluminum. We talked about the differences between the two and which one retains heat longer (cast iron). Next I showed them how we get the dutch ovens up to 350 degrees, buy putting a certain number of coals in a circle at the bottom of the oven, and putting another specific number of coals on the top of the lid in a circle around the edge, with two right next to the handle. Explain why spreading them out in a circle helps with heat circulation. We then stacked 2 or 3 ovens on top of each other, alternating the number of coals between the lid of the lower dutch oven and the lid of the next dutch oven. I did all of the stacking of dutch ovens and spreading out of the hot coals to avoid students getting burned, but students gathered around to learn as we went through this process.
Once the coals were on the dutch ovens, I told the students the pizzas would be ready in 10-20 minutes. I always bring out a few items for kids to play with while they wait. Frisbees, footballs, etc...
As the pizzas cooked I would lift off the lids with the lid lifter to check and make sure the cheese was melted. Once the pizzas were done, I had the students come back over with the large cutting boards. As I removed the lids, I would dump the charcoals into an extra oil pan to minimize a mess and let the coals cool. The students would then use hot pads (welding gloves) and grab the foil to remove their pizza from the dutch oven and place it on their cutting board. Remind students that the pizzas are hot - they just came out of a 350 degree oven. Students will then cut their pizzas up, let it cool for a few minutes, and then try their pizza creation.
As the dutch ovens are emptied, I would set them aside, away from the students and the hot coals so they could cool down.
By the time all the students had their pizzas cut up and eaten, it was almost time for class to end. I had students help clean up all the cooking utensils and ingredients and put them back in a cooler. The hot coals stayed in an oil pan until after school when I could dump them into a trash bag and dispose of them.
Closure:
As students were eating their pizzas, we talked about the difference between the ovens again, and talked about the benefits of using dutch ovens. Many students liked the idea of eating meals out of the dutch ovens and wanted to try desserts and other hearty dishes. I provided them with a Lodge brochure with a description of how many coals you should use when cooking to get to a specific temperature. It also included a few recipes for students to try if they wanted to pursue dutch oven cooking in the future. Check out the Lodge website for more information on dutch oven cooking and recipes.
Assessment :
Formative: Students participation in making the pizza will count for a formative grade for today. However, at the end of our wilderness skills unit students will have a quiz with information they learned during todays lesson.
Supplemental Information:
Modifications:
Since this activity must be done outside, choose a park or parking lot where you can cook on dirt or cement so you won't burn the grass. Community organizations who have dutch oven cooking supplies may even volunteer to teach this lesson to the students.
Safety Precautions:
Since you are dealing with extreme heat, make sure the students are aware of the location of the hot stoves and coals at all times.
Comments (adaptations for various grades/ages, teaching styles, etc.)
If you only have one stove, you could make a cobbler in it by showing the students the entire process. They could then taste the cobbler at the end of the class to see how good dutch oven cooking can taste.
Simple Cobbler recipe: 2 cans of pie filling (any flavors), 1 box of cake mix (white/yellow/confetti cake mix is popular), and 1 can of Sprite (full sugar). Use foil to line the pan, then dump both cans of pie filling into the bottom of the dutch oven. Dump the cake mix on top of the pie filling, and then pour the can of sprite all over the top of the cake mix. Put the lid on and cook it at 350 degrees for 35-45 minutes.