How to Create a Profile in OER Commons
Creating an account
Create an account so that you can use all of the features on OER Commons.
To create an account, click Register Now!

2. Enter the requested information in each field. Required fields are marked with an asterisk (*).
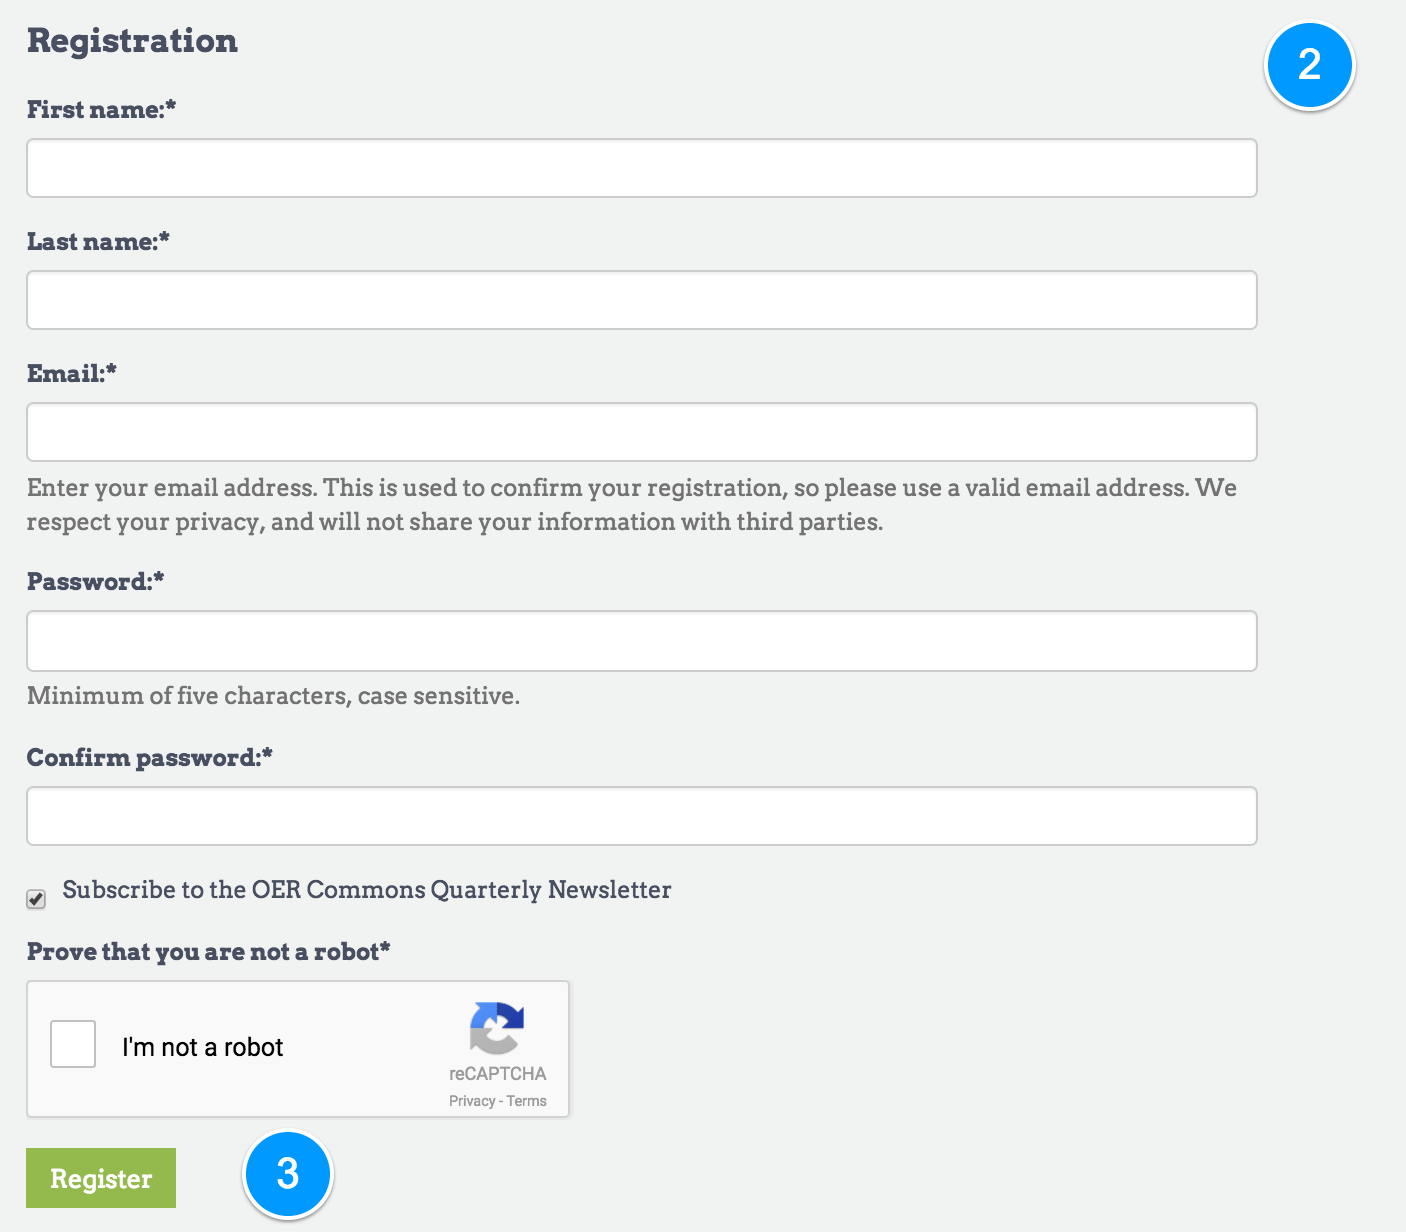
3. Once you have completed the information, click the Register button.
You will receive an email asking you to confirm your registration with OER Commons.
4. Click the link provided in the email, where you will be taken to the OER Commons site as a registered user. You can see you are logged into the site with your name at the top right hand side of the screen. You may begin exploring.
5. Clicking your name in the top right corner will take you to your OER Commons profile. This is where you will find all of your saved, authored, and draft resources. You may also access your Groups from this screen.
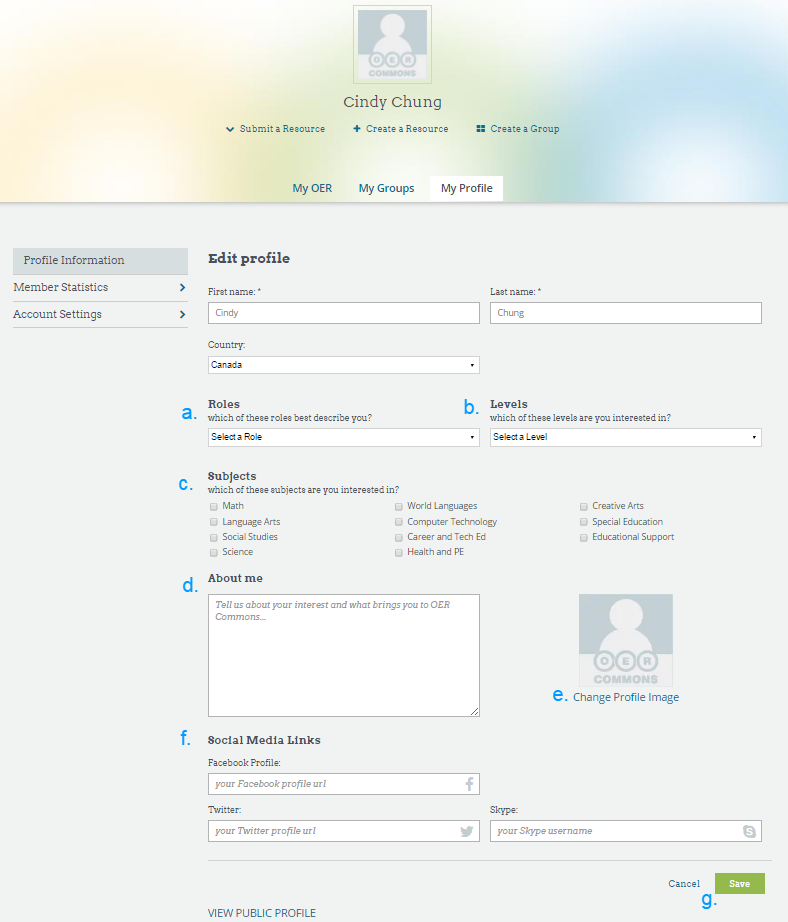
Creating your profile
You can set up a profile of yourself on OER Commons once you have created an account. Your profile is viewable by others and displays your areas of interest.
Login to OER Commons.
Click your name on the top right-hand side of the screen to access your account’s main page.

Click the My Profile tab. Click the Edit Profile link.

4. Enter information about yourself. Required fields are marked with an asterisk (*).
- a. Select a role for yourself from the drop down menu by clicking on a role. Choose more than one by selecting another role from the drop down menu again.
- b. Selected an educational level from the drop down menu. Choose more than one by selecting another level from the drop down menu again.
- c. Select the Subjects you are interested in.
- d. Enter a description about yourself in the About me field.
- e. Upload a photo of yourself by clicking on the Change Profile Image link
- f. Add your social media links from Facebook, Twitter, and Skype.
- g. Click the Save button