Distributed Database Systems through Database Clustering
Objectives:
This chapter will enable the students to:
1. Define a database cluster and discuss its advantages
2. Identify and obtain the requirements to set-up a cluster
3. Discuss Virtualization Technology
4. Create and configure a virtual machine with Linux OS
5. Use applicable Linux commands
6. Share files between Windows and Linux
Introduction
As stated in https://dev.mysql.com/doc/refman/5.7/en/mysql-cluster-overview.html:
“NDB Cluster is a technology that enables clustering of in-memory databases in a shared-nothing system. The shared-nothing architecture enables the system to work with very inexpensive hardware, and with a minimum of specific requirements for hardware or software.”
“NDB Cluster is designed not to have any single point of failure. In a shared-nothing system, each component is expected to have its own memory and disk, and the use of shared storage mechanisms such as network shares, network file systems, and SANs is not recommended or supported.”
“NDB Cluster integrates the standard MySQL server with an in-memory clustered storage engine called NDB (which stands for “Network DataBase”). In our documentation, the term NDB refers to the part of the setup that is specific to the storage engine, whereas “MySQL NDB Cluster” refers to the combination of one or more MySQL servers with the NDB storage engine.”
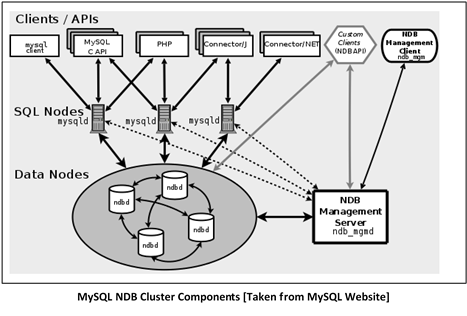
“An NDB Cluster consists of a set of computers, known as hosts, each running one or more processes. These processes, known as nodes, may include MySQL servers (for access to NDB data), data nodes (for storage of the data), one or more management servers, and possibly other specialized data access programs. The relationship of these components in an NDB Cluster is shown here:”
NDB Cluster Overview. Retrieved from https://dev.mysql.com/doc/refman/5.7/en/mysql-cluster-overview.html
NDB Cluster Overview. Retrieved from https://dev.mysql.com/doc/refman/5.7/en/mysql-cluster-overview.html
MySQL NDB Cluster basically has the following components:
1. Cluster Management Node
2. Data Node
3. SQL Node
Cluster Management Node
This node acts as the controller of the cluster. It provides configuration data that serves as reference for the other nodes. It can also be used to perform tasks such as starting and stopping a node. It is the first node that must be started in the cluster.
Data Node
This is used to store data within the cluster. Depending on the setup that you want to implement, your cluster can contain 2,4 or more data nodes containing the same set of data also known as replicas.
SQL Node
This serves as the gateway or entrance to the cluster data. This is in fact a MYSQL server which uses the NDBCLUSTER as its storage engine. The older MYSQL but very popular storage engines are MyISAM and InnoDB. The cluster could be integrated with two or more SQL Nodes to ensure high data availability.
Requirements to Setup MySQL NDB Cluster
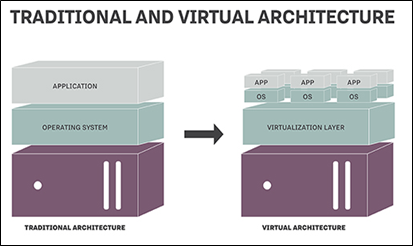
In the absence of a physical hardware to setup the cluster, Virtualization technology is a viable option not only for the sake of learning but also for real-life implementations.
In a virtual architecture, you can see that on top of the physical machine sits virtualization software which lays the ground for virtual environment. Inside the virtual environment, depending on the available memory, disk and CPU resources, several virtual machines (VMs) can be created. These VMs can act just like the physical computers. Each VM has its own operating system (OS) and applications. In the example that will be provided in this handout, each VM will be installed with an OS called Ubuntu 16.04 (one of the popular Linux distributions).
a. PC with enough memory, CPU and disk requirements to serve as a host
b. Virtualization software (e.g. Oracle VirtualBox, VMWare)
c. A VM with Linux OS distribution (Ubuntu 16.04 server), and enabled “root” user.
d. MySQL NDB Cluster installer
e. Knowledge of basic Linux commands
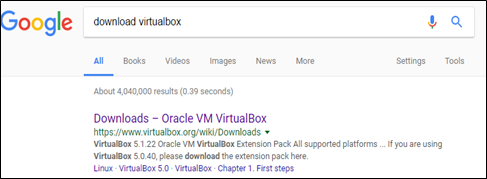
Downloading Oracle VirtualBox
.
2. Click the given link as shown in the above image
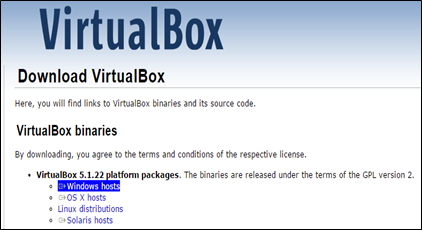
3. Click the “Windows hosts” link as shown below:
.
4. Once
downloaded, you may install the VirtualBox using the downloaded file. To do this task, you must have an
administrative privilege. Once
VirtualBox is installed, you will find a shortcut on your Desktop.

.
Downloading Ubuntu 16.04 (A Linux Distribution)
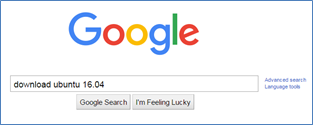
1. Do a Google search as shown below:
.
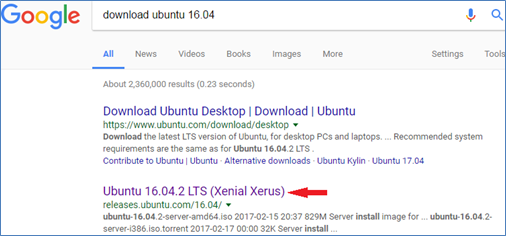
2. Click the link “Ubuntu 16.04.2 LTS (Xenial Xerus)
.
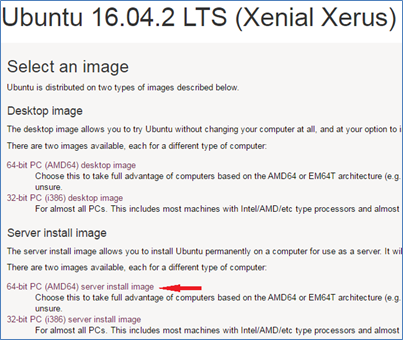
3. Click “64-bit PC
(AMD64) server install image”. However,
“32-bit PC (i386) server install image” can also be download if the PC runs on
32-bit platform.
.
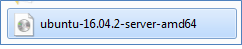
4. Once
download is complete, look for this file in your Download folder:
.
Congratulations!
You just had your Ubuntu Linux installer.
Downloading the MySQL NDB Cluster Installer
1. Do a Google search

.
2. Go to the download page by clicking the link
similar to the following:

.
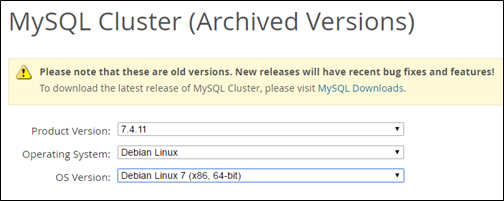
3. On
the download page, select the values as shown below:
.
Note: At the time
of writing this material, the latest generally available version was 7.5.x.
However, the version that we will be using is good enough to setup a
cluster. Normally, you can find fewer
support or help for newer versions in case you need it.
4. After choosing the values shown in the previous step, you get a single result as shown below. Click Download and wait until it’s done.

.
5. Once download is complete, copy the downloaded file “mysql-cluster-gpl-7.4.11-debian7-x86_64.deb”to your “shared” folder in Windows.
Congratulations! You just got the MySQL Cluster installer for free. The next section will cover the MySQL Cluster Installation.
Creating a Virtual Machine on Oracle VirtualBox
1. Open the Oracle VirtualBox [ Double-click the shortcut from your Windows Desktop or click from the Start Menu]
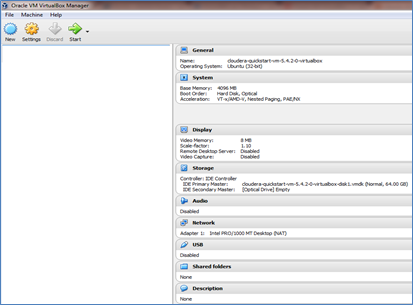
.
2. Click New [This opens up the screen as shown below.]
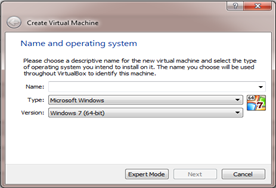
.
3. Enter the details as shown and click Next.
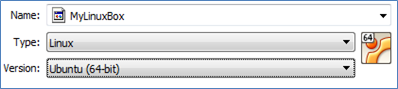
.
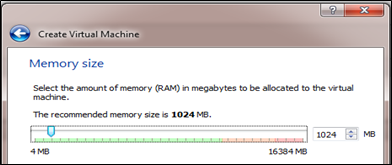
4. Enter the memory size to be allocated for your Linux box.
For this example, type in 1024. This is in terms of MB, which is equivalent to 1 GB. Take note that this memory size will also be taken from the available memory of your PC (the host machine) once you started your Linux box. Click Next when done.
.
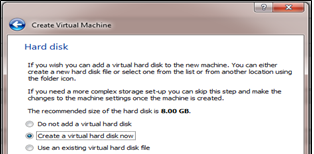
5. Create a virtual Hard Disk
In this step, just go with the default option which is “Create a virtual hard disk now” and click Create.
.
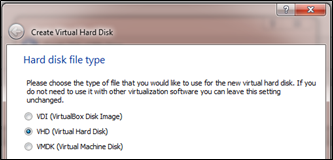
6. Specify the Hard disk file type.
In this example, choose VHD (Virtual Hard Disk), which is the second option. Click next when done.
.
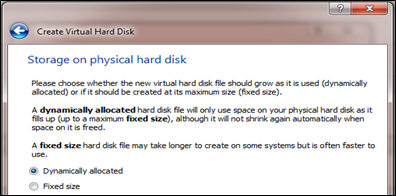
7. Storage on physical hard disk
Select Dynamically allocated, which is the default. Click Next.
.
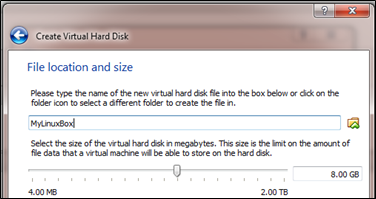
8. Set File location and size
Select the default, which is 8.00 GB. Click Create.
That’s it! You just created a new Linux virtual box keep in mind that the OS is not yet installed.
Your next task is to install the Ubuntu 16.04 server OS on your machine. You will use the installer that you have downloaded before.
.
Installing Ubuntu 16.04 on a Virtual Machine
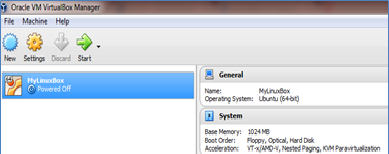
1. Click the Virtual Machine (MyLinuxBox) that you have just created and click Start.
.
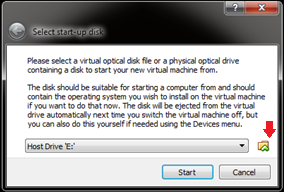
2. Select
Start-up Disk
Click the Open button pointed to by the arrow in the given screenshot.
.
It opens up a dialog box where you must
choose the Linux installer that you previously downloaded.
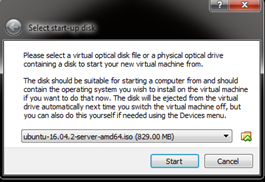
3. Navigate to the folder where the installer is saved and choose the installer similar to the given screenshot.
Click
Open. This goes back to the previous screen.

.
4. Click
Start
This
will lead you to the actual Ubuntu Server installation steps.
.
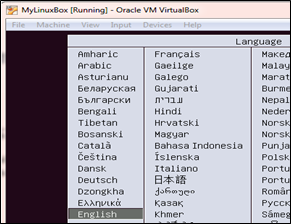
5. Choose a Language
Press enter to set English (default choice) as the language.
.
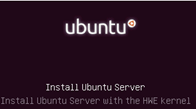
6. Install Ubuntu Server
Press
enter.
.
7. For
the next steps, just select the default option
as shown:
.
As a practice later on, you may proceed with a new installation and specify your desired values.
Select a language -> English
Select your location -> United States
Configure the keyboard layout -> No
Configure the keyboard
Country of origin -> English (US)
Keyboard layout -> English (US)
After all these steps, configuration starts.
8. Enter Host name
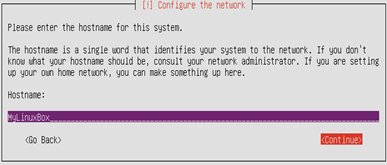
.
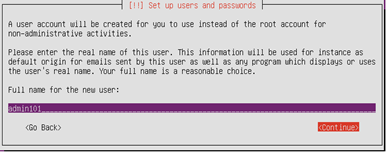
9. Enter the Full name

.
10. Set the Username
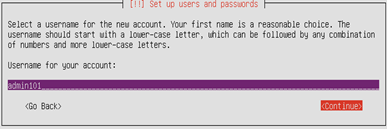
.
11. Set the Password
In the next steps, you will be asked to enter and re-enter your password. Do not forget your password.
If the password is found weak, you will be asked whether you want to use the password or not. If you want to change it, choose No. Otherwise, choose Yes to proceed to the next step.
12. Encrypt your home directory - For this example, select No and the setup will continue.
13. Configure the clock
Press Enter to select the default option (Eastern)
The setup will again continue.
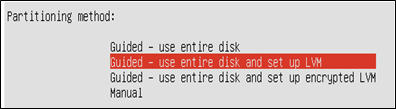
14. Partition Disks
Press Enter to select the default option (Guided – use entire disk and set up LVM)
.
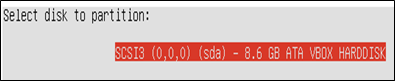
15. Select
disk to partition
.
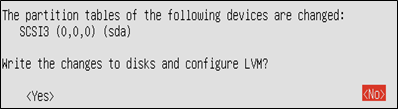
16. Write
changes to the disk
In this step, select Yes and press Enter.
.
17. Set the Amount
of volume
In this step, select Continue and press Enter

.
18. Write
the changes
Select Yes and press Enter
The setup will continue after this step. It will take a couple of minutes or more depending on the speed of your computer.

.
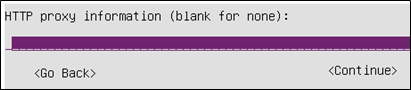
19. HTTP
proxy
Select Continue and press Enter. The setup will again continue. Please be patient, this step will take longer time.
.
20. Manage
Upgrades
Press Enter to choose the default option as shown in the given image.

.
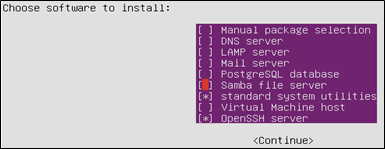
21. Choose
software to install
Choose the software you need from the list by pressing Space Bar. Choose the options as shown in the screenshot.
.
22. Install
the GRUB boot loader

.
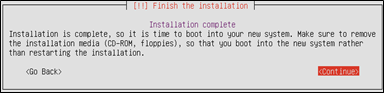
23. Installation
complete! Press
Enter to boot into the new system
.
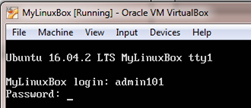
24. Logging in to your Linux VM
Use the user name and password that you have entered during installation.
.
Congratulations!
You just logged-in to your Linux virtual machine. The next workaround is to update the information on your machine with the newest versions of packages.
.
Enabling “root” user in Ubuntu
Unlike other Linux distributions, root user is not enabled by default in Ubuntu. The following instructions will teach you how to enable such user.
We will enable root user so that we can use it to execute commands that need admin privileges. Can you do this using the user you have created during installation? The answer is yes. However, before every command, you must add the word sudo, which means “super user do”.
Example: Creating a directory or folder
If you are logged-in as root, you just need the command: mkdir directory_name.However, for a non-root user with sudo privileges, you need to type the command sudo mkdir directory_name
Creating the root’s password
Before enabling the root user, let us set its password first. By the default, root has no password.
1. At the command prompt, type-in:
sudo passwd root (Press Enter)
2.
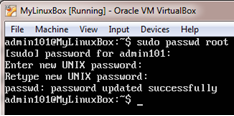
CreatingRootUser.png.
.
Note: Type the command clear followed by an Enter key to clear your screen.
Enabling “root” user
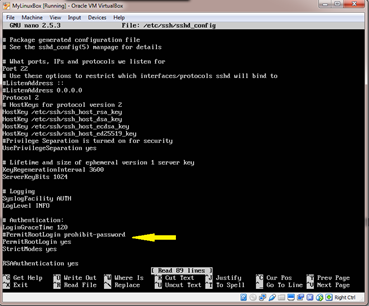
Open the configuration file by typing the command:
sudo nano /etc/ssh/sshd_config (press Enter)
This should bring up a window similar to the following screenshot:
This means that you want to open the sshd_config file using the nano editor of Linux.
1. Put # before PermitRootLogin prohibit-password command to make it as just a comment.
2. Next to the above-mentioned command, type PermitRootLogin yes
3. Save the changes by pressing Ctrl+X, then Y and Enter. This closes the nano editor and goes back to the command prompt.
4. Reboot the machine and login as root, type the command reboot and press Enter
.
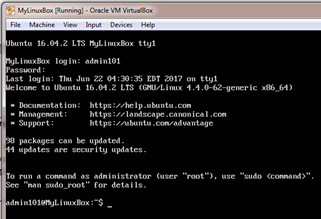
5. After reboot, you will be asked to login. At this point, type root as the login name followed by its password. If you’ve entered the correct values, you should see a screen similar to the following:
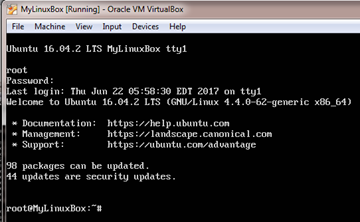
.
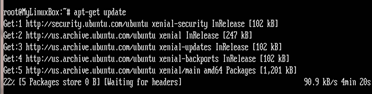
Updating and Upgrading the Linux VM and Installing Software
After a successful login, there are times when you could read a message such as:
98 packages can be updated.
44 updates are security updates.
As shown in the previous screenshot. These messages simply mean that you should update your system.
Updating the Linux VM
At the command prompt, type the command:
apt-get update (press Enter)
Immediately, update will start.
.
What does “apt-get update “mean?
Linux keeps information about the versions of packages available in your machine. This information is used to determine whether the package is still up-to-date or already old. If a package is found to be old, Linux will recommend that you update it.
So what is Package then?
A Package is a compressed file which contains all the necessary files needed by a certain application.
Therefore, such command means to update the package information database that is maintained by Linux.
Upgrading the Linux VM (Optional)
After a successful update of the packages using “apt-get update”, optionally, you may “upgrade” your Linux VM based on the updated packages. In both “update” and “upgrade” commands, you must be connected to the Internet.
To upgrade your Linux VM, at the command prompt, type in:
apt-get upgrade (and press Enter)
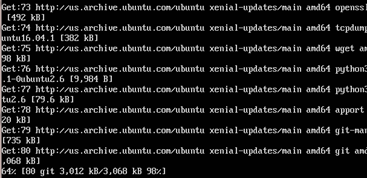
upgradinglinuxvm.png.
.
Basic Linux Commands
The table below contains few
Linux shell commands with meanings and examples. You will use most of these to
implement the related lab activities in this material.
|
Command |
Use |
Example |
Meaning |
|
clear |
Clears the screen |
clear |
Clears the screen |
|
ls |
List |
ls |
List all files and folders in the current directory |
|
ls /etc |
List all contents of etc directory |
||
|
ls /etc/*.conf |
List any file with .conf extension |
||
|
cd |
Change directory |
cd /etc |
Changes directory to etc |
|
cd .. |
One directory up/back |
||
|
cd ~ |
Goes to the user’s home directory |
||
|
cd - |
Goes to your previous working directory |
||
|
pwd |
Print working directory |
pwd |
|
|
mkdir |
Make directory |
mkdir dir1 |
Makes dir1 directory in the current directory |
|
mkdir /tmp/tmp1 |
Makes tmp1 directory inside tmp directory |
||
|
rm |
Removes file or directory |
rm –f /tmp/tmp1/a* |
Removes all files that start with “a” from tmp1 directory. |
|
rm –rf /tmp/tmp1 |
Removes the tmp1 directory |
||
|
mv |
Moves or renames a file |
mv a.txt /tmp |
Moves a.txt to tmp directory |
|
mv a.txt aa.txt |
Renames a.txt to aa.txt |
||
|
cat |
Displays the file contents |
cat /etc/ssh/sshd_config |
Displays the contents of sshd_config file all at once. |
|
cat /etc/ssh/sshd_config | more |
Displays the contents of sshd_config file. It pauses after 1 full screen then allows you to move line by line by pressing Enter key. |
||
|
chown |
Change owner |
chown my.cnf mysql:mysql |
Change the owner of my.cnf to user and group mysql |
|
wget |
Downloads file from a remote location |
wget http://devs.mysql/download/mysql.tar |
Downloads mysql.tar from the specified location. |
|
passwd |
Change user’s password |
passwd root |
Change root’s password to the desired one. |
|
grep |
Find a word(s) from a given file |
grep “Permit” /etc/ssh/sshd_config |
Finds the word “Permit” from sshd_config file. |
|
ps |
List your processes |
ps -ax |
List all current process |
|
ps –ax | grep “mysql” |
List all process containing the keyword “mysql” |
||
|
kill |
Ends a process |
kill -9 1234 |
Kills process ID 1234. Process number can be known using the “ps” command. |
|
ifconfig |
It means InterFace Configuration |
ifconfig |
Shows the configuration such as IP address of your machine’s network interface |
|
ping |
|
ping 192.168.1.54 |
Tests whether a network connection exists between your machine and the machine with the specified IP address. |
Sharing Files between Windows and Linux
In the implementation of
Virtualization, we have all the reasons to consider the host and guest as two
separate machines that can communicate with each other and share files as
well. In our example, the host machine
runs on Windows operating system while the guest machine runs on Ubuntu 16.04
server operating system. Though both of
them are on the same PC, they operate with their own resources such as disk
storage and memory. Both of them have IP
addresses which allow them to get connected to the network with unique
identities.
This section will walk you through the detailed steps that will lead you to share a folder from the host machine to the guest machine. In other words, a folder in Windows will be accessible from Linux environment. To make this possible, configurations should be made from two ends, the Windows and Linux.
Using the Windows machine, do the following:
1. Create a folder named “shared”.
2. Right-click the “shared” folder and click Properties.
3. From the Properties dialog box, click the Sharing tab.
4. On the Sharing tab, click the Share… button. This will show the screen below.
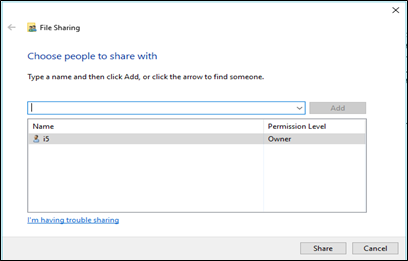
.
5. From the dropdown list, select “Everyone” and click Add
6. Click Share
7. Click Done.
Using the Linux VM, do the following:
1. Open the Oracle VirtualBox
2. Right-click your Linux VM (e.g MyLinuxBox) and click Settings…
3. From the Settings dialog, click Shared Folder.
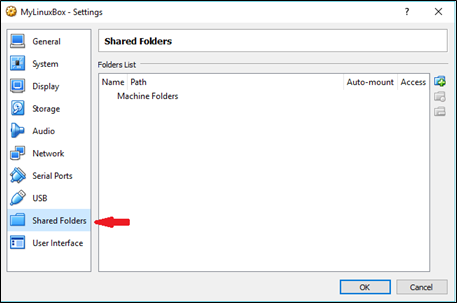
FileSharing2.png.
.
4. Click
the Add new shared folder button, as
show below:

.
5. From the Folder Path dropdown list, click Other…
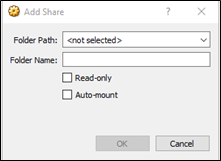
.
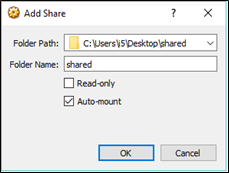
6. Select the “shared” folder from Windows
7. Tick Auto-mount as shown below and click OK.
.
8. Start your Linux VM (MyLinuxBox).
9. Login as “root” user
10. From the menu of your Linux VM, click Devices, point to Optical Drives and click VBoxGuestAdditions.iso
.
This
is like inserting a CD/DVD installer in a physical optical drive.
11. Type the command: mount /dev/cdrom /mnt (press Enter)

.
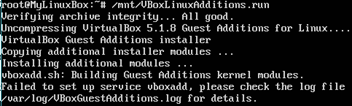
12. Run
the installer you’ve selected from step 3. Type the command:
/mnt/VBoxLinuxAdditions.run
(press Enter)
.
13. Add a users’ group called “vboxusers” by typing the command:
groupadd vboxusers (press Enter)
14. Add
“root” to vboxusers group by typing the command:
adduser root vboxusers (press Enter)

FileSharing9.png.
.
15. To apply the configurations you’ve made, reboot your machine by typing: reboot
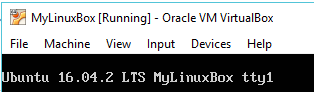
16. Login again as root
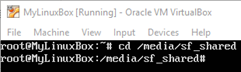
17. To verify whether you’ve successfully shared the Windows folder to your Linux VM, type the command:
cd /media/sf_shared (press Enter)
You should see an output similar to the screenshot below.
FileSharing10_78Fz4jo.png.
.
Type the command ls to list the contents of the shared directory.
Notice that the current directory is sf_shared. Keep in mind that “sf_” is automatically prefixed by Linux to the folder to indicate that it’s a “shared folder”. For example, if the shared folder name is opensource, then you can access the folder from Linux through the name sf_opensource.
Summary
This chapter had empowered you to understand what database clustering and virtualization technologies are all about. It also demonstrated how to freely obtain the software that will make-up cluster. Most importantly, it enabled you to create a virtual machine that will host the cluster components.
Assignment
Do the following assignment using your own laptop:
1. Create a new VM named “PracticeVM” based on what you have learned from this chapter. You may use the Ubuntu 16.04 Linux installer that you have already downloaded.
2. On Windows machine, create a folder named MyShared. Save a copy of your Ubuntu installer in this folder. Share this folder to everyone.
3. Configure your PracticeVM so that you can access the file(s) stored in MyShared folder of Windows.
4. Prove that you have done all the above requirements by showing your outputs to your teacher.