Identify the Simple Machines within the Rube Goldberg Machine
Have you ever wondered what life would be like without the inventions that we rely on every day. Cars, toasters, microwaves, cell phones, computers, lights, and so many more. The amazing thing about modern day technology and technological advances is that they all started from simple machines that have made our lives easier. Simple machines and work are the basis of all modern day inventions. If the simple machines were not invented then we would still be hunting and gathering to survive.
Rube Goldberg was an amazing person that saw the wonders of simple machines, he created cartoons that we still enjoy today and his subject was complex machines to do a simple task that were comprised of simple machines. Rube Goldberg saw that the industrial revolution was made up of many simple machines, he saw that the world was changing and he wanted people to see the humor of the machines that he created.
We are going to learn about the person of Rube Goldberg and the simple machines that he used to create his amazing machines.
Directions/ Goals and Objectives
Objectives
- Read and review the goals and objectives of this unit.
- Read all course materials
- Topic 1 Simple machines
- Topic 2 Rube Goldberg
- Topic 3 Designing a Rube Goldberg Machine
- Any link within the topics
- Websites linked in the Reading Materials
- Complete the two discussion posts and respond to two classmates
- Complete the two assignments by sharing them with me through Google use the following email address: jlrossman74@gmail.com
- Complete the short quiz on simple machines.
Goals
During this unit, students will:
- Learn about simple machines and how they helped develop civilization.
- Experience the person of Rube Goldberg, his life, accomplishments and the machines that we all know and love.
- Gain exposure to the Engineering Design Process.
Objectives 2
Upon completion of the unit, students will be able to:
- Identify the 6 simple machines
- Compare and contrast the different types of Engineering design processes
- Demonstrate the design process by creating a Rube Goldberg Machine
- Evaluate the life of Rube Goldberg and his accomplishments.
Topic 1: Simple Machines
Simple Machines.
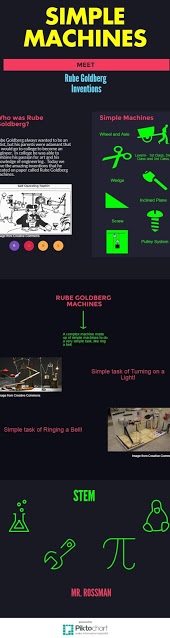
This image includes examples of simple machines: including Levers, Wheel and Axle, Inclined Plane, Wedge, Screw, and Pulley. It also has an image of a cartoon that Rube Goldberg Drew of his famous machines.
Simple machines are the basis of all inventions that we have today. Even when riding in a car or bus there are several simple machines at work. You may ask yourself, "Hey, what about computers they are certainly not simple machines?" Yes, they may not necessarily be a simple machine but the concept behind how computers are programmed are based on simple machines. When computers were first invented they were just series of levers representing on and off. Now they are based on something called binary which is a system of 1s and 0s which in concept is just like the very old computers that used on and off switches.
Simple machines were created to make work easier. Our ancestors wanted to make life easier for themselves just as we are still trying to create inventions that will continue to make our lives easier. To make life easier the simple machines changed how much energy is needed to complete a task.
There are six different simple machines. The lever has three different types, first class levers include pliers, scissors, and even a seesaw. A Second class lever includes a nutcracker and wheel barrow. A third class lever includes a hammer, shovel, and our arms. The next simple machine is the Wheel and Axle, it includes items like a fan and gears. Another simple machine is the pulley, it is like a wheel and axle except the wheel has a grove around the outside of it, this grove is for a rope, belt or chain. The fourth simple machine is the inclined plane, it is higher on one side and lower on the other this helps moves things from a lower level to a higher level with less effort. The wedge is the fifth simple machine it is made up of two inclined planes joined together, it is used to separate things. An ax and a knife are examples. The Finale simple machine is a Screw, it is an inclined plane wrapped around a cylindrical object. A drill bit, and a screw are a couple of examples of this simple machine. Review the this Simple Machines website to help you better understand what each simple machine is and how it is used.
Topic 2: Rube Goldberg
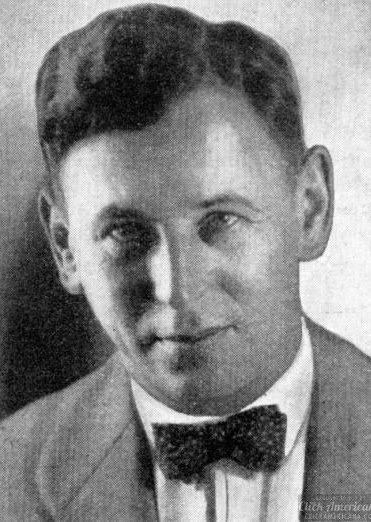
Rube Goldberg as a young man. Available at http://clickamericana.com/media/newspapers/rube-goldberg-in-his-own-words-1922, February 27, 2017
Who was this person called Rube Goldberg? Rube Goldberg was a very interesting person his passion was for art, but his parents did not think that being a cartoon artist would be a career that could provide for their son. They wanted Rube to go to college and become an engineer. His parents sent him to the University California at Berkeley to pursue his career in engineering. While he was in college he started to draw cartoons for the schools paper. It was here that he started to develop his famous character called Professor Lucifer Gorgonzola Butts. After he graduated he worked for the San Francisco designing sewers and he was not happy.
Rube Goldberg was not happy unless he was creating his cartoons he started working for a news paper in San Francisco and eventually made his way to New York City. The cartoons that has made him famous today were not really the ones that made him famous then. He was known to create political cartoons that were very influential. To find out more about Rube Goldberg check out the official site.
So what does Rube Goldberg and simple machines have in common. His cartoons featuring Professor Lucifer Gorgonzola Butts were all about these crazy machines that used many simple machines to do a very simple task. Like using a napkin to wipe his face as seen in the image at the beginning of this unit.
Topic 3: Designing a Rube Goldberg Machine
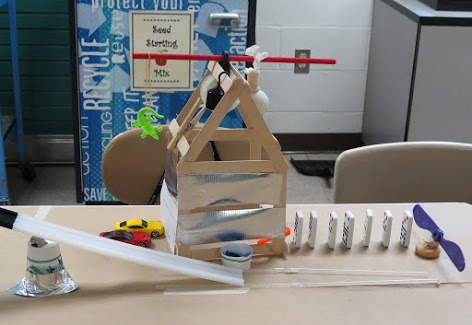
Student example of Rube Goldberg Machine Image from Creative Commons from Site: https://www.flickr.com/photos/cerdec/14580397143
Here we will begin the process of designing a Rube Goldberg Machine. Once we have an understanding of what simple machines are we can start to think about how we can design these intricate machines that use many simple machines. To make a successful machine that will accomplish the task that you want it to you should always start at the end. What is the task to complete and begin to work backward. Next you will want to figure out how many steps you will need to complete your task. Most of the time the number of steps or transitions is predetermined. In the Science Olympiad competition to get the maximum points they require 18 steps or transitions. Say that your task is to raise a flag. How are you going to make the flag raise? What type of simple machine would make sense to make that flag raise? The next step would be to start to think about what each transition will be as you are moving your way from the end of the design to the beginning of the design. Once you have a pretty good idea of what each step will be and how the transitions will work, then you will need to gather your materials that you will need to build the Rube Goldberg Machine.
One way to plan for your design is to follow The Engineering design Process developed by the Museum of science in Boston. Their process is a five step process that begins with asking a question. What is the problem? Our problem is that we want to raise a flag using 18 simple machines in sequence until the flag is raised. The second step is to imagine how the problem will be solved. This is where you would come up with several different ideas to make the machine work. The third part of the process is to plan. Here you will create a drawing and make a list of materials that you will need. The fourth part of the process it to create. This is when you build what you have planned to build and then test it out. The final step in the process is to improve your creation by fixing what does not work and improving areas that may not work well.
Now that you have your plan in place and all of the materials you can begin to build the machine. The last and most important part of this process is to make sure you are not completely in love with your design because you will probably start making changes as you begin the building process. Most of the time the design does not always work the way that you expect it to. You must be flexible, you must be willing to make changes as you work through your design. So, you may ask why go through the design process. The design process gives you a basis for where you are going and what you want to accomplish. The students that have a design in place before they start building usually have much better machines at the end even though their machine may not look exactly like what they were expecting and they are more successful at completing the task that they set out to accomplish.